There’s something so comforting about a treat that brings back childhood memories, but with a grown-up twist. For me, these Salted Caramel Cornflake Cups are exactly that! They remind me of those crispy, sweet clusters my grandma used to make, but with the added richness of homemade salted caramel and a silky milk chocolate ganache. It’s a little bit of nostalgia, a lot of deliciousness, and honestly, they’re just so fun to make and share.
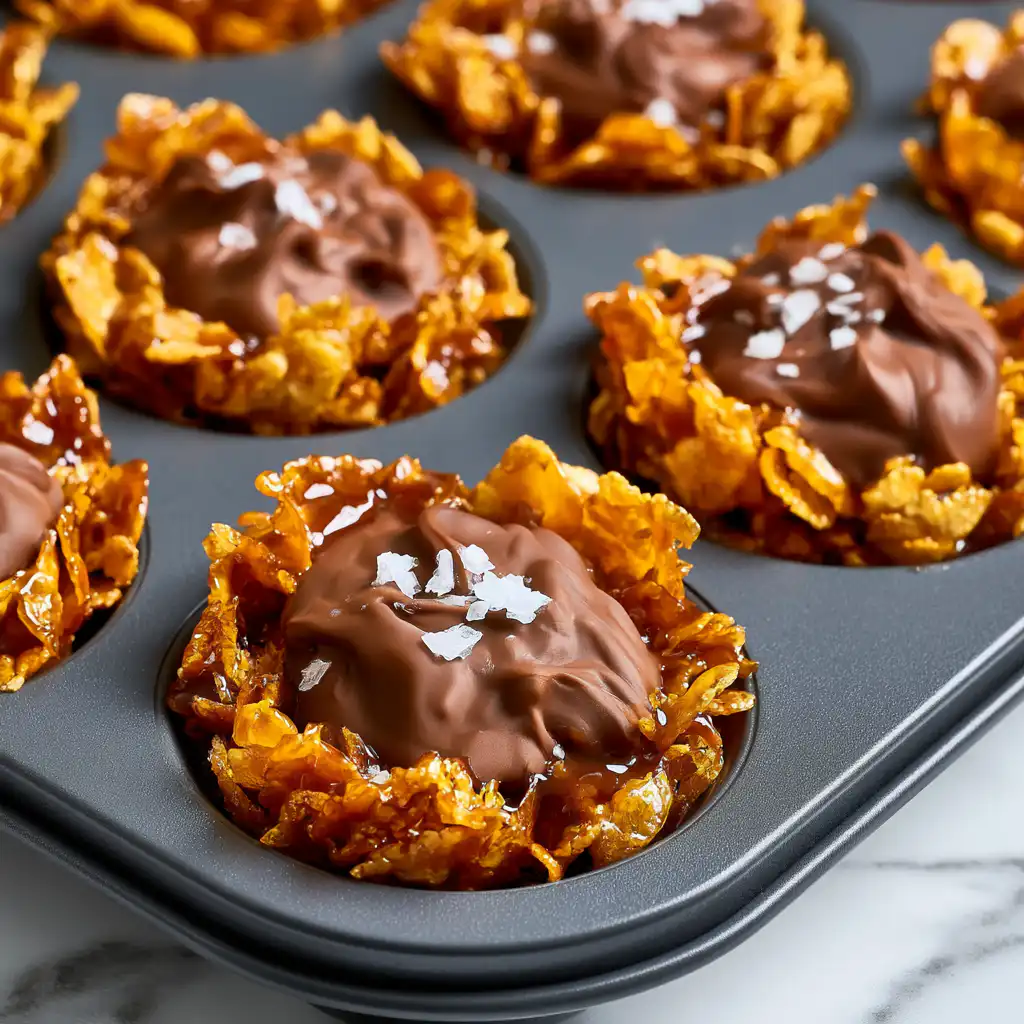
Why You’ll Love This Salted Caramel Cornflake Cups
- They’re a delightful mix of crunchy cornflakes and smooth, rich caramel and chocolate.
- No oven needed for the cornflake cups themselves, making them perfect for warmer days or when you just don’t want to bake.
- The sweet and salty combination is absolutely irresistible – a true crowd-pleaser!
- They look fancy, but are surprisingly simple to put together, even for beginner bakers.
Ingredients You’ll Need
- Caster Sugar: This superfine sugar melts beautifully and creates a smooth caramel. Granulated sugar can work in a pinch, but caster sugar really shines here.
- Cream: Full-fat heavy cream is essential for a rich, luscious caramel and a smooth ganache. Don’t skimp here!
- Butter: Unsalted butter is best so you can control the salt content. It adds richness and helps the caramel stay smooth.
- Sea Salt: Flaky sea salt is perfect for finishing, adding that lovely textural crunch and burst of saltiness. For the caramel, fine sea salt works well.
- Cornflakes: The star of our crispy cups! Make sure they’re fresh and not stale for the best crunch.
- Good Quality Milk Chocolate: This makes a huge difference in your ganache. Choose a chocolate you love to eat on its own.
How to Make Salted Caramel Cornflake Cups Step by Step
First things first, let’s get those caramel cornflake cups ready! You’ll want to lightly grease your non-stick cupcake tray. A little spray oil makes this super easy. Now, for the caramel: gently melt your caster sugar in a heavy-bottomed pot over low to medium heat. It’s important not to stir it much at this stage; just let it melt into a beautiful amber liquid. If it’s not melting evenly, you can very gently nudge the melted sugar towards the center with a wooden spoon.
Once your sugar is a gorgeous amber, take it off the heat and slowly, very slowly, whisk in the cream, a splash at a time. It will steam up quite a bit, so be careful! This is where the magic happens and your caramel starts to form. After all the cream is in, stir in the butter and salt until everything is combined and smooth. Now, pop it back on the heat with a candy thermometer and stir regularly until it reaches 116°C (240.8 °F). This might take about 15 minutes, so be patient!
While your caramel is still warm, pour it over your cornflakes in a big heatproof bowl and stir until every flake is coated in that sticky, golden goodness. Then, quickly divide the coated cornflakes into your prepared cupcake tray. Use the back of a spoon to really press them down firmly into each cup. To make that perfect little well for the ganache, gently press a lightly greased shot glass or small cup into the center of each cornflake cup. Let them cool completely – this is super important for them to set up properly.
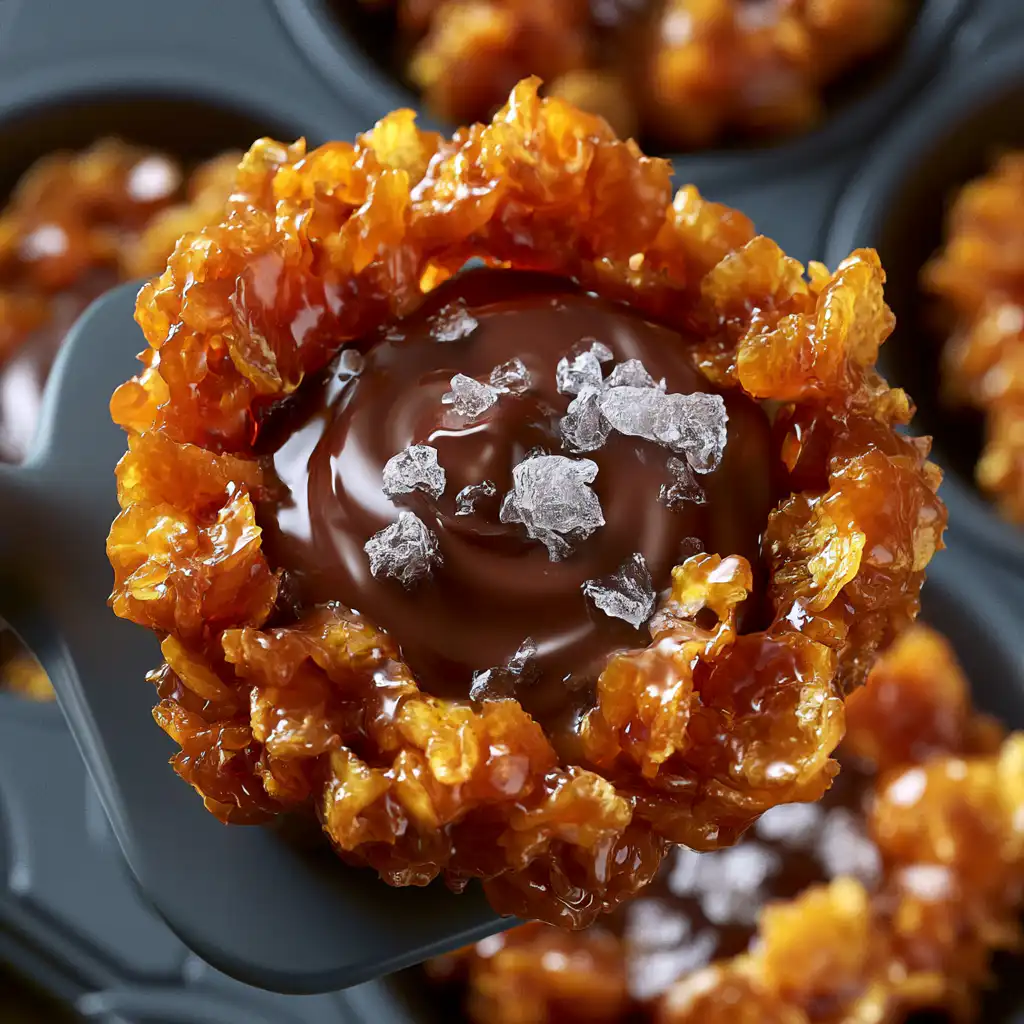
My Top Tips for Success
- I always use a heavy-bottomed pot for caramel; it helps prevent burning and ensures even heating.
- In my experience, patience is key with caramel. Don’t rush the melting sugar or the cooking process.
- Trust me on this one: have all your ingredients measured and ready before you start the caramel. It moves quickly!
- When making the ganache, chop your chocolate finely. It helps it melt more evenly and quickly into the hot cream.
- Don’t be afraid to really press those cornflakes into the cupcake tray. A compact base holds the ganache much better.
Common Mistakes to Avoid
- Stirring the sugar too early: This can cause the sugar to crystallize instead of melt smoothly into caramel. Let it melt without much disturbance.
- Adding cream too quickly to the caramel: The caramel will seize and splatter if you add cold cream all at once. Add it slowly, a little at a time, off the heat.
- Overheating the cream for the ganache: If the cream boils or gets a skin, it can affect the texture of your ganache. Heat it until it’s just piping hot.
- Not cooling the cornflake cups completely: If the cups are still warm, the ganache will melt right through them instead of setting properly.
- Not pressing the cornflakes firmly enough: Loose cornflake cups will fall apart when you try to remove them or fill them. Press them down well!
How to Store Salted Caramel Cornflake Cups
- Countertop: Up to 2 days in an airtight container, if your home is cool. The ganache can soften in warm temperatures.
- Refrigerator: Up to 5 days in an airtight container. Allow them to come to room temperature for about 15-20 minutes before serving for the best texture.
- Freezer: Up to 1 month in an airtight freezer-safe container. Thaw in the refrigerator overnight or at room temperature for a few hours.
Frequently Asked Questions
Can I use chocolate chips instead of a chocolate bar for the ganache?
Yes, you can use good quality chocolate chips for the ganache. However, chocolate bars often have a better melting consistency and flavor for ganache, so choose a brand you love.
My caramel seized when I added the cream. What went wrong?
This usually happens if the cream is too cold or added too quickly. Ensure your cream is at room temperature if possible, and add it very slowly, stirring constantly, off the heat.
Can I make these dairy-free?
It would be very challenging to make these dairy-free while maintaining the same texture and flavor. The caramel and ganache rely heavily on dairy cream and butter.
How do I know when the caramel has reached the right temperature?
You need a candy thermometer to accurately measure 116°C (240.8 °F). This temperature is crucial for the caramel to set correctly without being too hard or too soft.
What if I don’t have a piping bag for the ganache?
No problem at all! You can simply spoon the cooled, thickened ganache into the cornflake cups. It might not look as neat, but it will taste just as delicious.
I hope these Salted Caramel Cornflake Cups bring a little extra crunch and joy to your day! They’re such a fun and rewarding treat to make. If you give them a try, please let me know how they turn out – I’d love to hear about your baking adventures!
PrintSalted Caramel Cornflake Cups

Crispy cornflake cups filled with luscious homemade salted caramel and topped with a rich milk chocolate ganache.
- Prep Time: 30
- Cook Time: 20
- Total Time: 110
- Yield: 12 cups
- Category: Dessert
- Method: No-Bake
- Cuisine: American
Ingredients
- 300 g caster sugar
- 150 g cream
- 100 g butter
- 1 tsp sea salt
- 150 g cornflakes
- 150 g good quality milk chocolate
- 150 g cream
- flaky sea salt to finish
Instructions
- Lightly grease a non-stick cupcake tray with oil or butter.
- Place the caster sugar in a heavy-bottomed pot.
- Cook the sugar over a low to medium heat.
- Do not stir the sugar.
- Cook until the sugar has fully melted and is a rich amber colour.
- If needed, gently pull melted sugar into the centre with a wooden spoon.
- Remove the pot from the heat.
- Slowly whisk in 150 g cream, a splash at a time.
- Stir in the 1 tsp sea salt and 100 g butter.
- Stir until the butter has melted.
- Return the pot to the heat.
- Insert a candy thermometer into the caramel.
- Watch and stir regularly with a wooden spoon.
- Cook until the mixture reaches 116°C (240.8 °F).
- Have the 150 g cornflakes ready in a large heatproof bowl.
- Once the caramel reaches temperature, gently pour it over the cornflakes.
- Stir to completely coat the cornflakes.
- Evenly distribute the cornflakes into the cupcake tray.
- Use the back of a spoon to firmly press and compact the cornflakes into each cup.
- Make a well in the centre of each cup by pressing a lightly greased shot glass or small cup into it.
- Allow the cornflake cups to cool completely.
- Roughly chop the 150 g good quality milk chocolate.
- Place the chopped chocolate into a heatproof bowl.
- Heat the remaining 150 g cream in a small pot over a medium heat.
- Heat until the cream is piping hot but not boiling.
- Watch closely to prevent burning or skin formation.
- Pour the hot cream over the chopped chocolate.
- Allow to sit for a few minutes.
- Mix with a spatula until the ganache is smooth and glossy.
- Allow the ganache to cool at room temperature until it begins to thicken.
- Place the thickened ganache into a piping bag.
- Pipe or spoon the ganache into each cornflake cup.
- Place the cups into the fridge for at least one hour.
- Chill until the ganache is set.
- Sprinkle with flaky sea salt to finish.
- Enjoy your Salted Caramel Cornflake Cups.
Notes
Use a candy thermometer for accurate caramel temperature.
Chop chocolate finely for a smoother ganache.
Ensure cornflake cups are fully cooled before filling.
Store in an airtight container in the fridge.


![Easy Southern Peach Cobbler [with Canned Peaches]](https://theflakytruth.com/wp-content/uploads/2026/08/cmswa1vwj00lb102k5xxpcxh8-hero-300x300.webp)