There’s something so wonderfully nostalgic about sugar cookies. For me, they bring back memories of childhood cookie decorating parties, sprinkles everywhere, and lots of laughter. But sometimes, you want something a little more elegant than just sprinkles, right? That’s where these beautiful Marbled Sugar Cookies come in! They’re soft, tender, and have the most gorgeous swirled icing that looks super fancy but is actually so much fun to make.

Why You’ll Love These Marbled Sugar Cookies
- They are incredibly soft and chewy, thanks to a secret ingredient (cream cheese!).
- The marbling technique looks impressive but is surprisingly easy to achieve.
- They’re perfect for any occasion – from holidays to just a sweet afternoon treat.
- The flavor is classic sugar cookie with a lovely hint of vanilla and almond.
Ingredients You’ll Need
- Unsalted Butter: Make sure it’s at room temperature for easy creaming. This helps create a smooth, airy base for your cookies.
- Full Fat Cream Cheese: This is the magic ingredient that makes these sugar cookies incredibly soft and gives them a slight tang. Also, room temperature is key here! You can check out my Cream Cheese Cookies for another delicious way to use this ingredient.
- Granulated Sugar: Sweetens the cookies and helps with that tender texture.
- Large Egg: Binds everything together and adds richness.
- Vanilla Extract or Vanilla Bean Paste: Essential for that classic sugar cookie flavor. Use paste for those lovely little vanilla specks!
- Almond Extract: This is optional, but it adds a wonderful depth of flavor that complements the vanilla beautifully.
- All-Purpose Flour: The structure of our cookie dough.
- Cornstarch: A little cornstarch helps keep the cookies soft and prevents them from spreading too much.
- Baking Powder: Our leavening agent, giving the cookies a slight lift.
- Fine Salt: Balances the sweetness and enhances all the other flavors.
- Powdered Sugar: The base for our royal icing. Make sure it’s sifted to avoid lumps!
- Meringue Powder: This is crucial for royal icing. It helps the icing set hard and shiny, and makes it safe to eat (since it contains pasteurized egg whites).
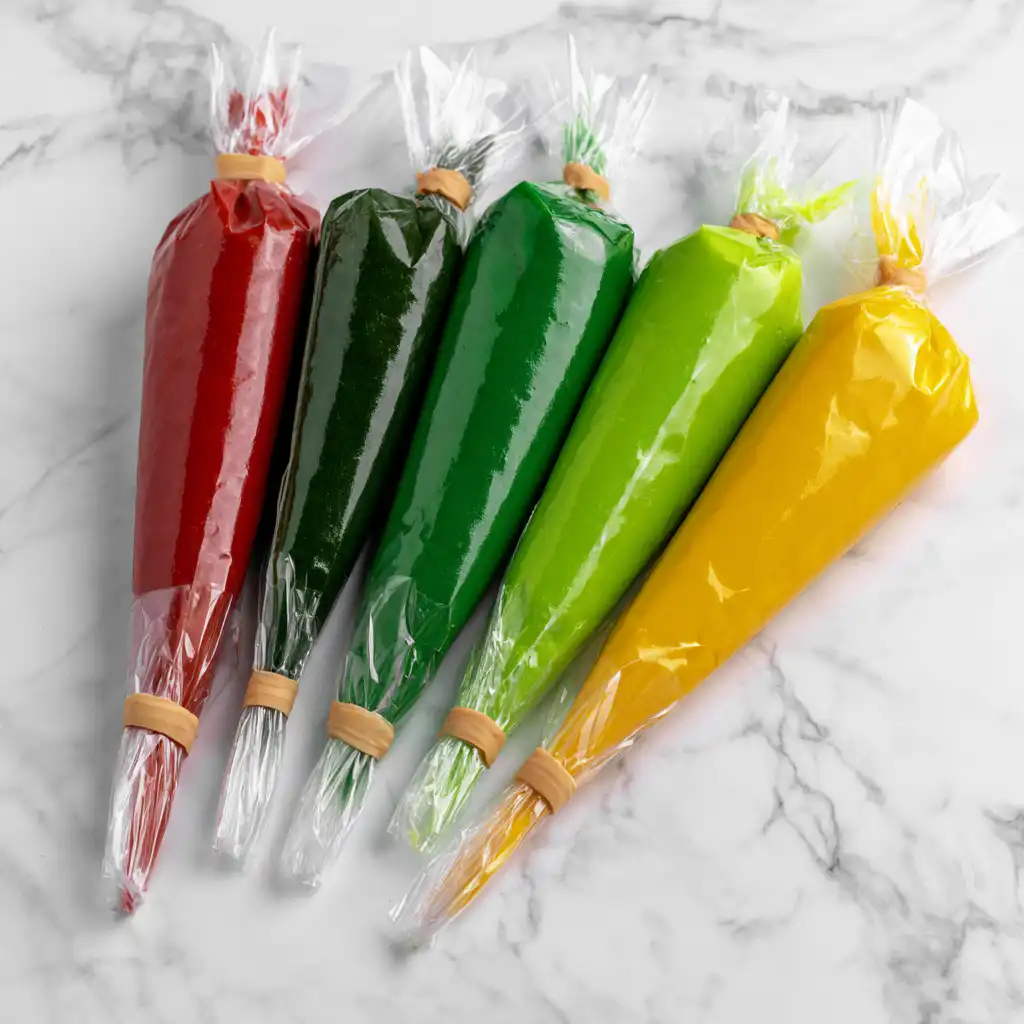
- Gel Food Coloring: Use gel, not liquid, for vibrant colors without thinning out your icing too much.
How to Make Marbled Sugar Cookies Step by Step
First things first, let’s get that cookie dough going! In a big bowl, you’ll beat together your room temperature butter and cream cheese until they’re super smooth. Don’t rush this step; it makes a big difference in the final texture. Then, add in your granulated sugar and beat it for a couple of minutes until the mixture lightens in color and gets fluffy. This incorporates air, which is great for soft cookies!
Next, you’ll mix in your egg, vanilla, and the optional almond extract. In a separate bowl, whisk together your dry ingredients: flour, cornstarch, baking powder, and salt. Now, slowly add the dry mixture to the wet mixture in two parts, mixing on low speed until everything is just combined. It’s okay if it’s a bit sticky at this point. Divide the dough, flatten it slightly, and wrap it up for a chill in the fridge for about 2 hours, or the freezer for 30 minutes. This chilling step is super important for preventing spread!
While the dough chills, preheat your oven to 350°F (175°C) and get your baking sheets ready with silicone mats or parchment paper. When you’re ready to roll, take out one portion of dough, leaving the other to stay cold. Roll it out on plastic wrap to about 1/3 inch thick – this makes cleanup so easy! Cut out your shapes, brush off any extra flour, and place them on your prepared baking sheets. Pop those cut-out cookies back in the fridge for another 15 minutes or the freezer for 5 minutes before baking. Bake them one sheet at a time for 10-12 minutes, keeping a close eye on them so the edges don’t brown. Let them cool on the pan for a bit, then move them to a wire rack. Repeat with your second dough portion and any scraps.
My Top Tips for Success
- I always make sure my butter and cream cheese are truly at room temperature. It makes creaming them together so much easier and results in a smoother dough.
- In my experience, chilling the dough is non-negotiable for sugar cookies. It prevents them from spreading too much and helps them hold their shape.
- Don’t overmix the flour! Mix until just combined to keep your cookies tender. Overmixing develops gluten, which can make cookies tough.
- Trust me on this one: use gel food coloring for the icing. Liquid coloring can thin out your royal icing, making it harder to get that perfect consistency.
- When decorating, don’t be afraid to experiment with the marbling! Every cookie will be unique, and that’s part of the charm.
- I always bake one sheet of cookies at a time. This ensures even baking and prevents the cookies from getting too dark or undercooked.
Common Mistakes to Avoid
- Overmixing the Dough: This can lead to tough cookies. Mix only until the flour is just incorporated.
- Not Chilling the Dough Enough: If your dough isn’t properly chilled, your cookies will spread too much in the oven and lose their shape.
- Baking at Too High a Temperature or for Too Long: This will result in dry, crispy cookies instead of soft ones. Keep an eye on them and pull them out before the edges brown.
- Not Sifting Powdered Sugar for Icing: This can lead to lumpy icing, which is hard to work with and doesn’t look as smooth on your cookies.
- Not Covering Royal Icing: Royal icing crusts very quickly when exposed to air. Always place plastic wrap directly on the surface of the icing to prevent this.
How to Store Marbled Sugar Cookies
- Room Temperature: Store in an airtight container for up to 2 days.
Frequently Asked Questions
Can I make the cookie dough ahead of time?
Yes, absolutely! You can prepare the cookie dough and keep it wrapped tightly in plastic wrap in the refrigerator for up to 3 days. You can also freeze the dough for up to 3 months.
What if I don’t have meringue powder for the royal icing?
Meringue powder is pretty essential for royal icing to set properly and be food-safe. I don’t recommend substituting it, but you can find it in most baking aisles or craft stores.
My royal icing is too thick/thin. How do I fix it?
If your icing is too thick, add water a teaspoon at a time until it reaches the desired flooding consistency. If it’s too thin, add 2 Tbsp of powdered sugar until it thickens up.
Can I use butter extract instead of almond extract?
Yes, you can! If you prefer a buttery flavor over almond, feel free to substitute the almond extract with an equal amount of butter extract. Or, you can just omit the almond extract entirely.
I truly hope you give these beautiful Marbled Sugar Cookies a try! They’re such a delightful treat to make and share, and that marbling technique is so satisfying. Let me know if you make them; I’d love to see your gorgeous creations!
PrintMarbled Sugar Cookies

Soft and tender cream cheese sugar cookies with a beautiful, easy-to-achieve marbled royal icing.
- Prep Time: 45
- Cook Time: 12
- Total Time: 177
- Yield: 24 cookies
- Category: Dessert
- Method: Baking
- Cuisine: American
- Diet: Vegetarian
Ingredients
- 3/4 cup (1 1/2 sticks) unsalted butter, room temperature
- 1/2 cup or 4 oz. full fat cream cheese, room temp
- 1 1/2 cups granulated sugar
- 1 large egg, room temperature
- 2 tsp vanilla extract or vanilla bean paste
- 1 tsp almond extract – optional
- 3 cups all-purpose flour
- 1 Tbsp cornstarch
- 1/2 tsp baking powder
- 1/2 tsp fine salt
- 3 cups powdered sugar
- 3 Tbsp meringue powder
- 1/4 cup water, room temp
- 2 tsp vanilla or almond extract
- Additional water to bring to flooding consistency
- Gel food coloring
Instructions
- Beat the butter and cream cheese in a large bowl or stand mixer on medium speed until smooth.
- Add granulated sugar and mix on medium-high speed for 2 minutes until lighter in color.
- Mix in the egg, 2 tsp vanilla extract, and optional 1 tsp almond extract on medium speed until incorporated.
- Whisk together flour, cornstarch, baking powder, and salt in a separate bowl.
- Add the flour mixture to the wet mixture in two additions, mixing on low speed until just incorporated.
- Scrape the sides of the bowl with a rubber spatula between additions.
- Divide the sticky dough in half.
- Wrap each dough portion in plastic wrap, flattening it into a 1/2 inch thick rectangle.
- Chill the dough in the fridge for 2 hours or freezer for 30 minutes.
- Preheat the oven to 350°F (175°C) 30 minutes before rolling out the dough.
- Line two large baking sheets with silicone baking mats or parchment paper.
- Take one piece of dough out of the fridge, leaving the other chilled.
- Unwrap the dough and lay the plastic wrap flat on your counter.
- Dust both sides of the dough and your rolling pin with flour.
- Roll the dough to be 1/3 inch thick.
- Cut out shapes with a flour-dusted cookie cutter.
- Brush any excess flour off the cookies with a kitchen brush.
- Place cookies on the prepared baking sheets, about 1 inch apart.
- Chill the cut-out cookies in the fridge for 15 minutes or freezer for 5 minutes.
- Bake one sheet of cookies at a time for 10-12 minutes on the top rack of your oven.
- Pull cookies out before the edges start to brown.
- Let baked cookies cool on the pan for 15 minutes.
- Transfer cookies to a wire rack to finish cooling completely.
- While the first batch bakes and cools, knead together cookie dough scraps.
- Rewrap scraps in plastic wrap and chill in the fridge.
- Pull out the second chilled dough portion and repeat steps for rolling, cutting, chilling, and baking.
- Repeat with chilled dough scraps.
- Whisk together 3 cups powdered sugar and 3 Tbsp meringue powder in a large bowl or stand mixer for the icing.
- Add 1/4 cup water and 2 tsp vanilla or almond extract.
- Mix on low speed to incorporate liquid, then increase to medium speed and mix until stiff peaks form (about 4 minutes).
- Scrape around the sides and bottom of the bowl as needed.
- Add additional water 1 Tbsp at a time until a flooding consistency is reached (approx. 3 Tbsp total).
- Perform the Figure 8 test: lift a spoon and create a figure 8 with runoff icing; it should disappear in 8 seconds.
- Adjust consistency by adding 2 Tbsp powdered sugar if too thin, or 2 tsp water if too thick.
- Place plastic wrap directly on top of the royal icing to prevent crusting.
- Once cookies are cool, use 2/3 cup of royal icing for each color you want.
- Color each portion of icing with gel food coloring.
- Place each colored icing into its own small piping bag and seal the top with a rubber band.
- Transfer the remaining uncolored royal icing into a smaller bowl for dipping.
- Cut small openings (1/4 inch) in the tips of the piping bags.
- Drizzle the colored icings on top of the uncolored icing in the dipping bowl.
- Use a toothpick or scribe to drag lines through the colors to create a swirled pattern.
- Dunk cooled cookies into the glaze one at a time, covering the entire surface.
- Shake off excess icing before flipping the cookie over.
- Set dipped cookies aside to dry.
- Drizzle and swirl more colored icing in the bowl after each cookie to ensure vibrant marbling.
- If icing in the bowl starts to crust, carefully scoop off the top layer before dipping the next cookie.
- Let cookies dry for 1 hour or until firm to the touch.
- Store cookies at room temperature in an airtight container.
Notes
Ensure butter and cream cheese are at room temperature for a smooth dough.
Chill dough thoroughly to prevent spreading during baking.
Do not overmix the flour to keep cookies tender.
Use gel food coloring for vibrant icing without affecting consistency.




![Easy Southern Peach Cobbler [with Canned Peaches]](https://theflakytruth.com/wp-content/uploads/2026/08/cmswa1vwj00lb102k5xxpcxh8-hero-300x300.webp)