Oh, you know those evenings when you just crave something warm, savory, and utterly comforting? For me, that’s almost every night! Lately, my go-to has been these incredible Keto Cheesy Garlic Breadsticks (4 Ingredients). They’ve become a staple in my kitchen because they’re so quick to whip up, and honestly, they hit that cheesy, garlicky spot every single time without derailing my low-carb goals. My family devours them!
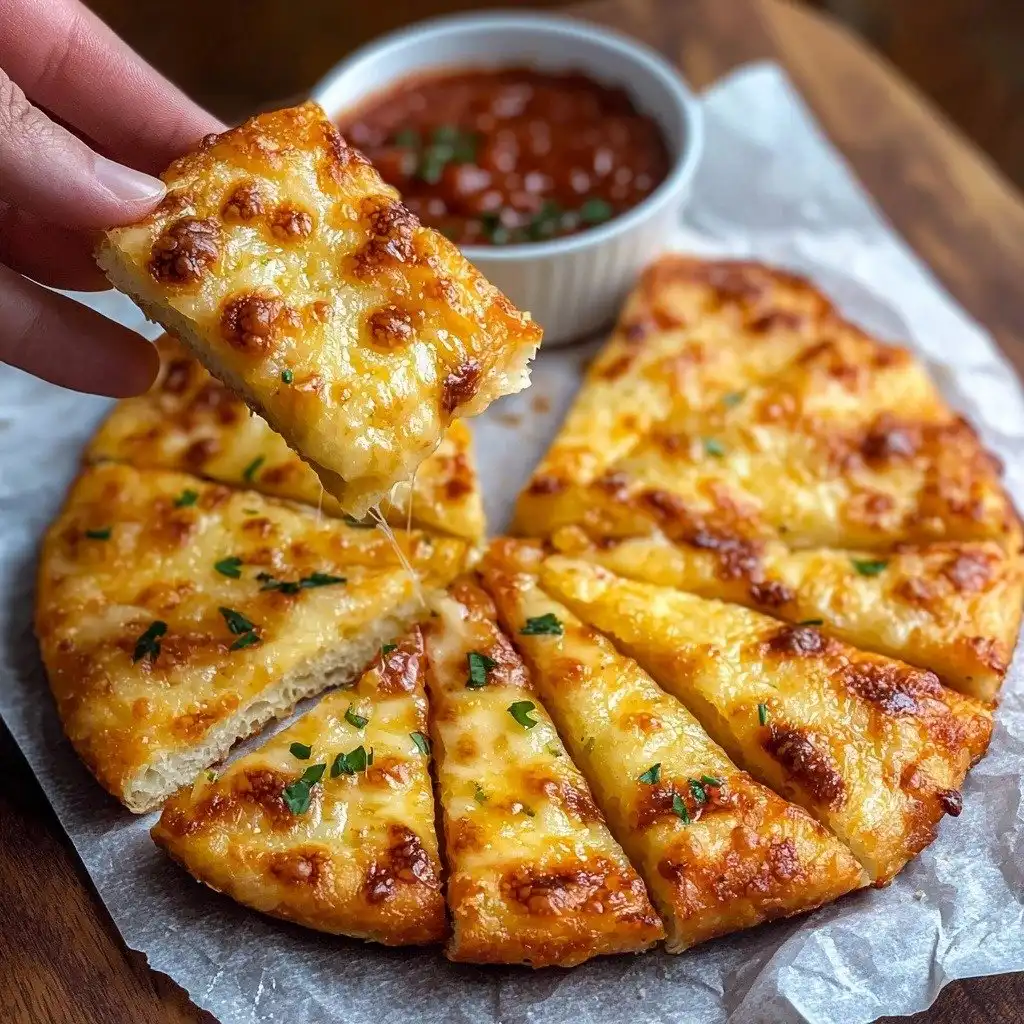
Why You’ll Love This Keto Cheesy Garlic Breadsticks (4 Ingredients)
- They’re incredibly quick and easy to make, perfect for a last-minute craving.
- You only need four simple ingredients you probably already have on hand.
- The texture is amazing: crispy edges, gooey, cheesy center, just like real breadsticks.
- They’re super versatile and pair perfectly with so many meals, or as a standalone snack!
Ingredients You’ll Need
- Shredded Mozzarella: This is your base and what gives you that amazing, melty stretch. Use a low-moisture, part-skim mozzarella for the best texture.
- Shredded Parmesan Cheese: Adds a fantastic salty, nutty depth of flavor. Don’t skip it!
- Egg: Our magic binder! It helps hold everything together so your breadsticks don’t fall apart.
- Garlic Powder: The star of the show for that classic garlic bread taste.
How to Make Keto Cheesy Garlic Breadsticks (4 Ingredients) Step by Step
First things first, let’s get your oven ready. You’ll want to preheat it to 350 degrees Fahrenheit. While it’s warming up, grab a baking sheet and line it with some parchment paper. This step is super important, trust me, it makes cleanup a breeze and prevents sticking!
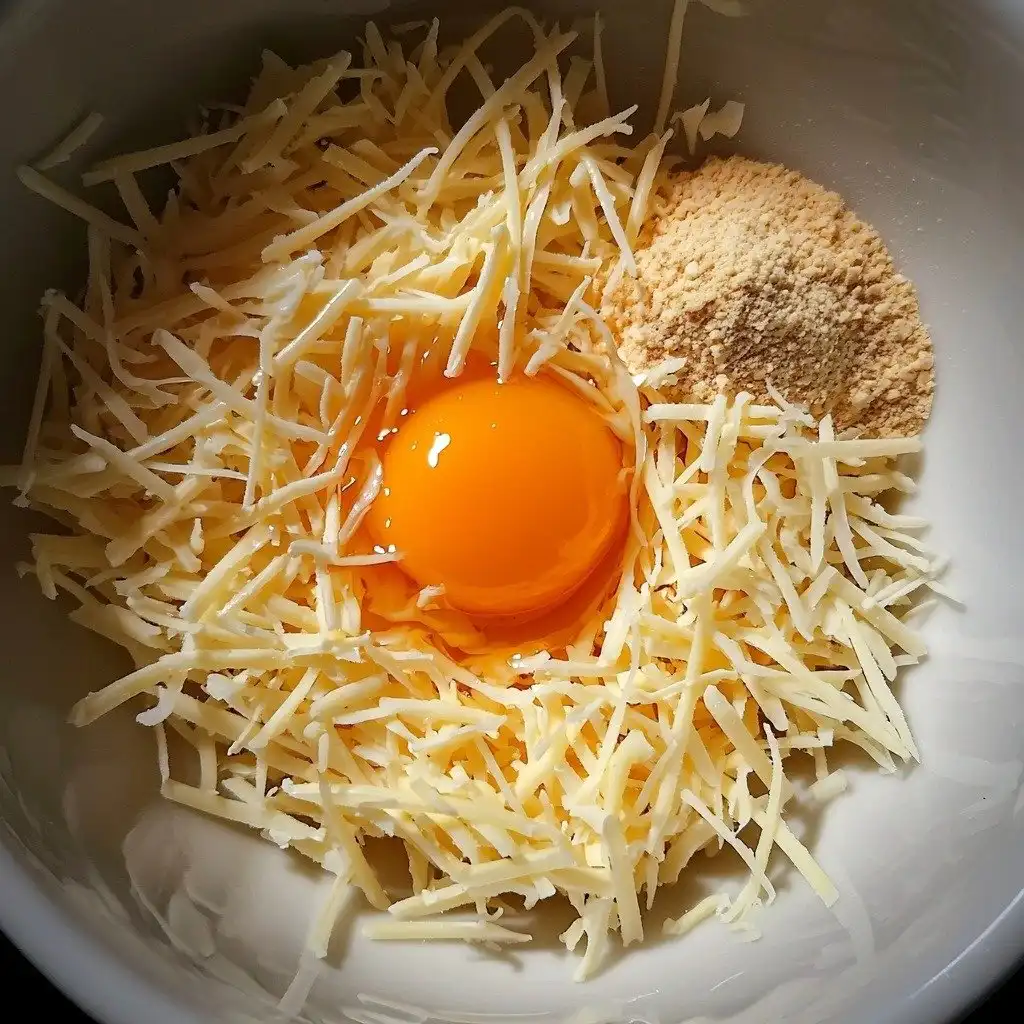
Next, in a medium-sized bowl, you’re going to combine all your wonderful ingredients: the shredded mozzarella, shredded Parmesan cheese, that single egg, and the garlic powder. Just mix them all together really well until everything is fully incorporated. It might seem a little sticky, but that’s perfectly normal.
Now for the fun part! Take your cheesy mixture and place it right onto the parchment paper on your baking sheet. Use your hands or a spatula to flatten it out into a rectangle, kind of like you’re shaping a pizza crust. Make it as even as you can so it bakes consistently. Pop it into the preheated oven and bake for about 15 minutes. After that, switch your oven to broil and move the baking sheet to the top rack for just a few minutes. This is where the magic happens and the cheese gets beautifully golden brown and bubbly! Just keep a close eye on it so it doesn’t burn.
My Top Tips for Success
- I always recommend using parchment paper; it’s a lifesaver for easy removal and cleanup.
- In my experience, finely shredded cheese melts more evenly and quickly.
- Trust me on this one: keep a very close eye on the breadsticks during the broiling stage; they can go from perfect to burnt in seconds!
- For extra flavor, a sprinkle of dried Italian seasoning or a touch of onion powder mixed in is lovely.
- Don’t overcrowd your baking sheet; give the breadsticks room to crisp up.
Common Mistakes to Avoid
- Not using parchment paper: The cheese will stick to the baking sheet, making them hard to remove and a mess to clean. Always use parchment paper!
- Over-broiling: This can lead to burnt, bitter breadsticks. Watch them constantly during the broil cycle.
- Not mixing ingredients thoroughly: You might end up with pockets of just cheese or egg, so ensure everything is well combined.
- Making them too thick or too thin: Too thick and they won’t crisp; too thin and they might burn easily. Aim for about a quarter-inch thickness.
How to Store Keto Cheesy Garlic Breadsticks (4 Ingredients)
- Refrigerator: Store cooled breadsticks in an airtight container for up to 3-4 days.
- Freezer: Freeze cooled breadsticks in a single layer on a baking sheet, then transfer to a freezer-safe bag for up to 1 month. Reheat in the oven.
- Reheating: For best results, reheat in a toaster oven or conventional oven at 350°F (175°C) until warmed through and crispy, about 5-10 minutes.
Frequently Asked Questions
Can I use pre-shredded cheese?
Yes, absolutely! Pre-shredded cheese works perfectly fine for this recipe and saves you a bit of time.
Can I make these dairy-free?
Unfortunately, this recipe relies heavily on cheese for its structure and flavor, so it’s not easily adaptable to be dairy-free.
What can I dip these breadsticks in?
These are fantastic with a low-carb marinara sauce, sugar-free pizza sauce, or even a side of ranch dressing.
Can I add other seasonings?
Definitely! Feel free to add a pinch of dried oregano, basil, or a sprinkle of red pepper flakes for a little kick.
Why did my breadsticks not get crispy?
Make sure your oven is fully preheated and don’t skip the broil step! Also, ensure they are flattened to an even thickness.
I hope these Keto Cheesy Garlic Breadsticks (4 Ingredients) become a new favorite in your home, just like they have in mine! They’re such a simple, satisfying treat that proves eating low-carb doesn’t mean sacrificing flavor. If you make them, I’d love to hear how they turned out and what you served them with!
PrintKeto Cheesy Garlic Breadsticks (4 Ingredients)
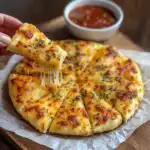
These incredibly easy and delicious keto breadsticks are made with just four ingredients, perfect for a quick snack or side dish.
- Prep Time: 5
- Cook Time: 17
- Total Time: 22
- Yield: 8 breadsticks
- Category: Appetizer
- Method: Baking
- Cuisine: American
- Diet: Keto, Gluten-Free
Ingredients
- 1 cup shredded mozzarella
- 1 cup shredded parmesan cheese
- 1 egg
- 1 tsp garlic powder
Instructions
- Preheat your oven to 350 degrees Fahrenheit.
- Line a baking sheet with parchment paper.
- In a bowl, combine all of the ingredients together.
- Mix until well incorporated.
- Place the mixture onto your parchment paper.
- Flatten it out like you would a pizza crust.
- Bake for about 15 minutes.
- Switch the oven to broil.
- Move the baking sheet to the top rack.
- Broil for a few minutes to brown the cheese until golden.
- Slice with a pizza cutter.
- Enjoy immediately!
Notes
Ensure you use parchment paper for easy removal.
Watch breadsticks closely under the broiler to prevent burning.
For extra flavor, add a pinch of dried Italian seasoning.
Serve warm for the best taste and texture.


![Easy Southern Peach Cobbler [with Canned Peaches]](https://theflakytruth.com/wp-content/uploads/2026/08/cmswa1vwj00lb102k5xxpcxh8-hero-300x300.webp)