Every year, as soon as the leaves start to turn and there’s a crispness in the air, my mind goes straight to Halloween. It’s not just about the costumes and spooky decorations for me; it’s about the baking! There’s something so magical about making treats that are both delicious and festive. These Halloween Chocolate Chip Cookies have become a cherished tradition in my home, bringing smiles and a little bit of spooky joy to everyone who tries them.

Why You’ll Love This Halloween Chocolate Chip Cookies
- They’re incredibly easy to make, even for beginner bakers.
- The texture is perfect: soft and chewy in the middle with slightly golden edges.
- They’re super adaptable for any spooky occasion with fun sprinkles and candy eyes.
- Everyone loves a good chocolate chip cookie, and these just have that extra festive flair!
Ingredients You’ll Need
- Unsalted Butter: Melting the butter here creates that wonderfully chewy texture we all love. Make sure it’s unsalted so you can control the saltiness.
- Brown Sugar: Packed light brown sugar adds moisture and a lovely caramel note, contributing to the cookies’ chewiness.
- Granulated Sugar: This works with the brown sugar to give the cookies structure and that perfect sweetness.
- All-Purpose Flour: Make sure to spoon and level your flour, don’t scoop it directly from the bag. This prevents adding too much flour, which can make your cookies dry.
- Baking Soda: This is our leavening agent, helping the cookies spread just right and get that soft texture.
- Halloween Sprinkles: These are essential for that festive look! Use any mix of Halloween-themed sprinkles you love.
- Candy Eyes: Totally optional, but they add so much personality and fun to your spooky treats!
How to Make Halloween Chocolate Chip Cookies Step by Step
First things first, grab a big bowl! You’ll start by combining your melted butter with both the granulated and light brown sugars. Give it a good mix until everything is smooth and looks well combined. This is where the magic begins, creating that rich base for our cookies.
Next, you’ll add the egg and vanilla extract. Keep mixing until these are fully incorporated. Don’t worry if it looks a little runny at this stage; we’re building layers of deliciousness! Then, it’s time for the dry ingredients: flour, salt, and baking soda. Start mixing on low speed to gently bring them together. Once they just start to combine, you can turn up the speed a little for another 15-30 seconds until the batter is smooth. Remember to scrape down the sides of the bowl to make sure everything gets mixed in evenly. The key here is not to over-mix – as soon as it’s combined, stop!
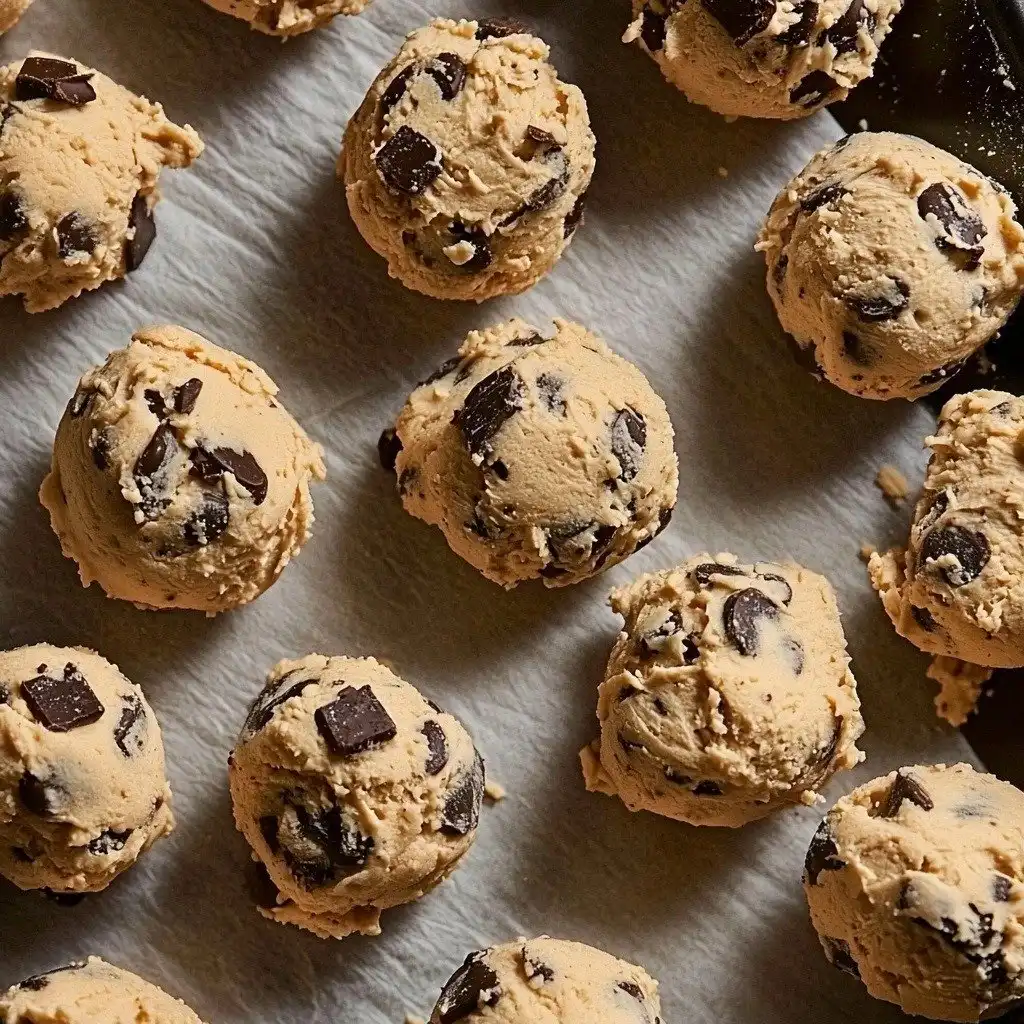
Now for the fun part! With a spatula or a large spoon, gently fold in your chocolate chips and those festive Halloween sprinkles. Try not to crush them. Once everything is mixed, you’ll scoop out 2-tablespoon balls of dough onto a parchment-lined baking sheet. You don’t need to space them out much right now because we’re going to chill them. Cover the sheet with plastic wrap and pop it into the fridge for at least 1.5 to 2 hours, or even overnight. This chilling step is super important for flavor and texture!
When you’re ready to bake, preheat your oven to 350°F (175°C). Take your chilled dough balls and place them about 2 inches apart on a fresh parchment-lined baking sheet. Bake them for 11-13 minutes, or until the edges are golden brown. As soon as they come out of the oven, if you’re using candy eyes, gently place them on the warm cookies. Let them cool on the baking sheet for a few minutes before transferring to a wire rack to cool completely. Then, get ready to enjoy your spooky, delicious creations!
My Top Tips for Success
- Chill the Dough: Trust me on this one! Chilling the dough for at least 1.5 hours prevents the cookies from spreading too much and deepens their flavor.
- Spoon and Level Flour: I always make sure to spoon my flour into the measuring cup and then level it off with a straight edge. This prevents dry, crumbly cookies.
- Don’t Overmix: Once the flour is added, mix just until combined. Overmixing develops the gluten too much, leading to tough cookies.
- Parchment Paper is Your Friend: Always use parchment paper or a silicone mat for easy cleanup and to prevent sticking.
- Candy Eyes Immediately: In my experience, if you’re using candy eyes, place them on the cookies right when they come out of the oven. The warmth helps them adhere.
Common Mistakes to Avoid
- Over-measuring Flour: This is a common one! Too much flour makes cookies dry and dense. Use the spoon and level method.
- Not Chilling the Dough: Skipping the chilling step will result in flatter, wider cookies that don’t have that perfect chewy center.
- Overbaking: Cookies continue to cook slightly on the baking sheet after they’re removed from the oven. Take them out when the edges are golden and the centers still look a little soft.
- Mixing in Sprinkles Too Vigorously: This can cause the colors to bleed into the dough. Gently fold them in with a spatula.
How to Store Halloween Chocolate Chip Cookies
- Room Temperature: Store in an airtight container at room temperature for up to 3-4 days.
- Freezing Baked Cookies: Place cooled cookies in a single layer in a freezer-safe bag or container, separating layers with parchment paper. Freeze for up to 3 months. Thaw at room temperature.
- Freezing Cookie Dough: Form dough balls and freeze them on a baking sheet until solid. Transfer to a freezer-safe bag and freeze for up to 3 months. Bake from frozen, adding a couple of extra minutes to the bake time.
Frequently Asked Questions
Can I use cold butter instead of melted?
No, this recipe specifically calls for melted butter. Using cold butter will result in a completely different cookie texture and consistency. Stick to melted butter for the best results!
What if I don’t have light brown sugar?
You can use dark brown sugar in a pinch, but it will give the cookies a slightly deeper molasses flavor and color. For the intended result, light brown sugar is best.
Can I make the dough ahead of time?
Absolutely! The dough can be made up to 24 hours in advance and stored in the refrigerator. This actually helps develop the flavors even more!
My cookies spread too much. What happened?
This is usually due to the dough not being chilled enough, or your oven temperature being too low. Make sure to chill the dough for the full recommended time.
Can I use different types of chocolate chips?
Yes, feel free to use milk chocolate, dark chocolate, or even white chocolate chips! A mix can be really fun and delicious too.
I genuinely hope these Halloween Chocolate Chip Cookies bring a little extra magic and deliciousness to your spooky season. They’re so simple to make, yet always a huge hit! If you give them a try, please let me know how they turn out in the comments below. Happy baking!
PrintHalloween Chocolate Chip Cookies

Chewy, festive chocolate chip cookies packed with Halloween sprinkles and candy eyes, perfect for a spooky treat.
- Prep Time: 20
- Cook Time: 13
- Total Time: 153
- Yield: 24 cookies
- Category: Dessert
- Method: Baking
- Cuisine: American
- Diet: Vegetarian
Ingredients
- 1/2 cup unsalted butter melted
- 1/3 cup granulated sugar (67 g)
- 1/2 cup packed light brown sugar (100 g)
- 1 large egg
- 1 teaspoon vanilla extract
- 1/2 teaspoon salt
- 1/2 teaspoon baking soda
- 1 1/2 cups all-purpose flour spooned and leveled (186g)
- 1 1/2 cups chocolate chips
- 1/2-3/4 cup halloween sprinkles
- candy eyes optional
Instructions
- Place melted butter, brown sugar, and granulated sugar into a bowl.
- Mix until smooth and combined.
- Add vanilla and egg.
- Continue mixing until combined.
- Add flour, salt, and baking soda to the bowl.
- Mix on low speed until ingredients just start to combine.
- Increase speed and mix for another 15-30 seconds until the batter is smooth.
- Scrape down the sides of the bowl as necessary to ensure everything is incorporated.
- Stop mixing as soon as the batter is combined to avoid over-mixing.
- Using a spatula or large spoon, gently fold in the sprinkles and chocolate chips.
- Scoop 2-tablespoon balls of dough onto a baking sheet lined with parchment paper.
- Cover the baking sheet with plastic wrap.
- Place in the fridge for 1.5 to 2 hours, or up to 24 hours, to chill the dough.
- When ready to bake, preheat your oven to 350℉ (175°C).
- Arrange the chilled dough balls on a baking sheet lined with parchment paper or a silicone baking mat, ensuring they are about 2 inches apart.
- Bake for 11-13 minutes, or until the edges are golden.
- Remove cookies from the oven.
- If using candy eyes, immediately place them onto the warm cookies.
- Let cookies cool completely before serving.
- Enjoy!
Notes
Always spoon and level your flour to avoid dry cookies.
Chilling the dough is crucial for preventing spread and enhancing flavor.
Do not overmix the dough once flour is added.
Place candy eyes on cookies immediately after baking while they are still warm.
Store in an airtight container for best freshness.






![Easy Southern Peach Cobbler [with Canned Peaches]](https://theflakytruth.com/wp-content/uploads/2026/08/cmswa1vwj00lb102k5xxpcxh8-hero-300x300.webp)