There’s something truly magical about homemade pizza night, isn’t there? For me, it’s not just about the delicious food, but the joy of gathering around, everyone choosing their favorite toppings, and that incredible aroma filling the kitchen. This artisan pizza dough – crispy, chewy, bubbly crust – is the secret ingredient that turns an ordinary weeknight into a special occasion. It’s the kind of crust that makes you close your eyes and savor every bite, and trust me, you’ll feel like a total pro making it!
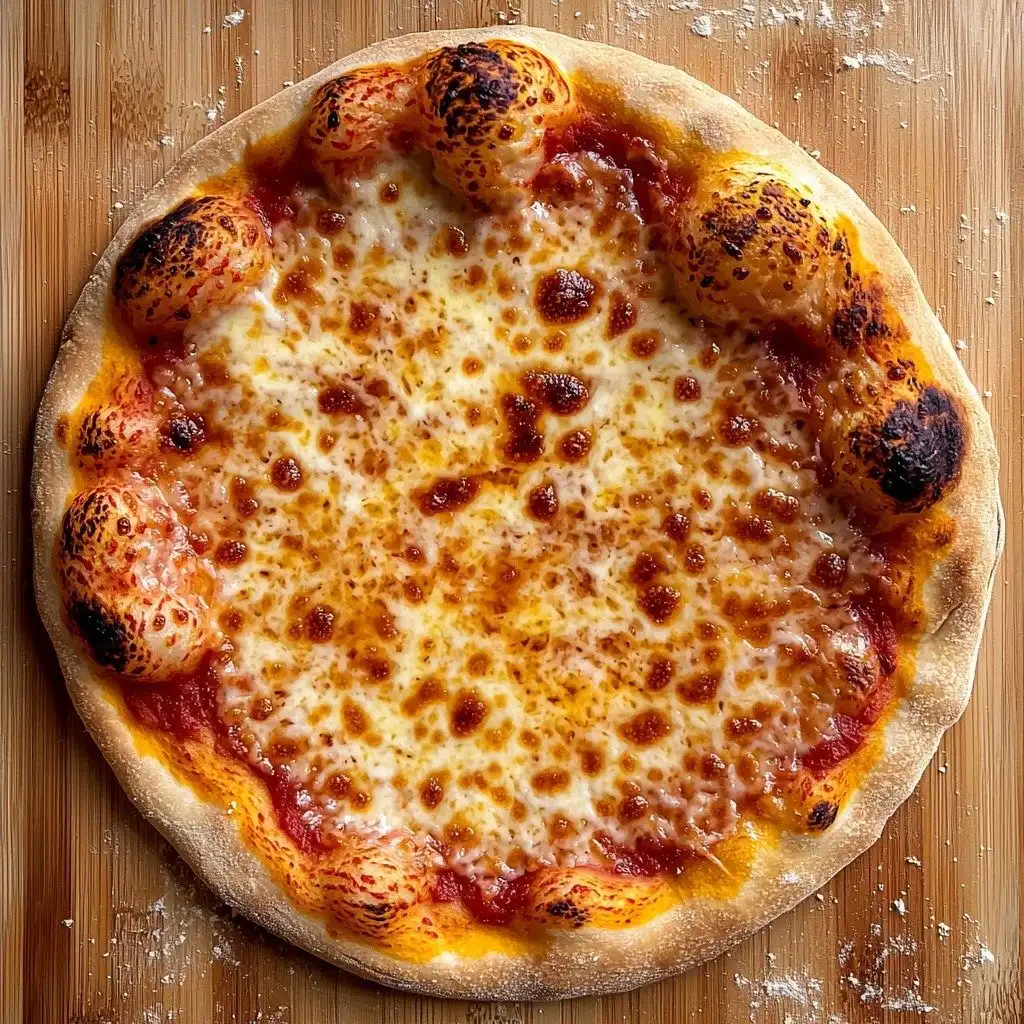
Why You’ll Love This artisan pizza dough- crispy, chewy, bubbly crust
- This crust is truly next-level with its perfect crispy, chewy, bubbly texture. It’s what pizza dreams are made of!
- You only need a few simple ingredients, and the process is surprisingly forgiving for such a gourmet result.
- It’s incredibly versatile – perfect for any toppings you can imagine, from classic Margherita to creative gourmet combinations.
- Making your own pizza from scratch is such a rewarding experience, and this recipe makes it totally achievable.
Ingredients You’ll Need
- All-purpose flour: This is your base! It gives the dough its structure. No need for fancy bread flour here, plain all-purpose works beautifully.
- Warm water: Crucial for activating the yeast. Make sure it’s warm, not hot, or it could kill your yeast. Think bathwater temperature.
- Active dry yeast: The little powerhouse that makes your dough rise and gives it that wonderful airy texture.
- Fine salt: Don’t skip the salt! It brings out all the flavor in your dough and helps control the yeast activity.
How to Make artisan pizza dough- crispy, chewy, bubbly crust Step by Step
First things first, grab a big bowl. You’ll mix your flour and most of your warm water until they’re just combined. Don’t worry if it looks shaggy and unappealing right now; we call this a “shaggy mass,” and it’s perfectly normal! Cover it up and let it rest for 20 minutes. This resting time, called autolyse, helps the flour absorb the water and starts to develop the gluten, making your dough easier to work with later.
While that’s resting, sprinkle your yeast over the remaining warm water in a separate small bowl and let it sit for a few minutes to dissolve. Once your main dough has rested, sprinkle the salt over its surface. Then, pour that dissolved yeast mixture right over the dough. Now for the fun part: gently fold the dough! Wet your hand a little to keep it from sticking, then reach under the dough, stretch a section over the top, and repeat until the center is covered. Then, you’ll use your thumb and fingers to pinch off small chunks of dough, squeezing them together. Keep wetting your hand as needed. Fold the dough over itself a few times, repeating the pinching and folding until you have a shaggy dough where the yeast and salt are fully mixed in. Cover the bowl again and let it rest for about an hour.
After that hour, you’re going to do one more fold to really develop that gluten. Again, wet your hand slightly. Reach under the dough, stretch a section up, and fold it over the center. Rotate your bowl and repeat this 4 to 5 more times until the dough feels like it’s tightening into a ball. Now, carefully invert the entire ball of dough into a clean, lightly greased bowl, so the seam is facing down and the top is nice and smooth. Cover it up and let it rise until it’s doubled in volume. This part takes a bit of patience, usually 5 to 6 hours, but it’s where all that wonderful flavor develops!
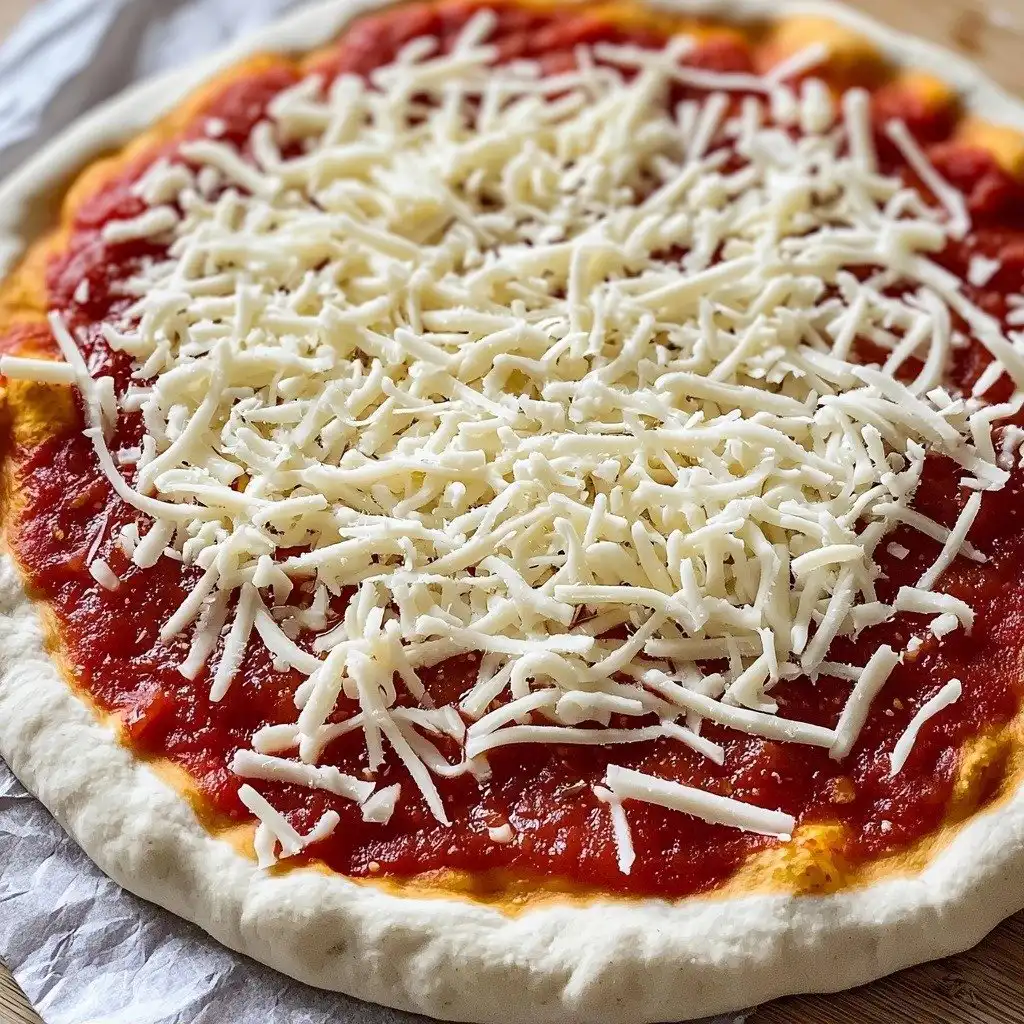
My Top Tips for Success
- I always recommend using a kitchen scale for flour and water. It’s much more accurate than cup measures and makes a big difference in dough consistency.
- In my experience, using warm water (around 100-110°F or 38-43°C) is key for waking up that active dry yeast.
- Trust me on this one: don’t rush the resting and rising times. These slow processes are what give your dough its amazing texture and flavor.
- When shaping the dough balls, a light touch is best. You want to create tension on the surface without tearing the dough.
- Preheat your oven and pizza stone/steel for at least 45 minutes, or even an hour. The hotter it is, the better your crust will be!
- If you’re not using all the dough immediately, refrigerate it. It actually develops even more flavor over a day or two!
Common Mistakes to Avoid
- Using water that’s too hot or too cold: If your water is too hot, it will kill the yeast, and your dough won’t rise. If it’s too cold, the yeast won’t activate properly. Aim for warm bathwater temperature.
- Not letting the dough rest enough: Rushing the resting periods means the gluten won’t develop properly, making your dough difficult to stretch and less chewy. Patience is key!
- Overworking the dough when mixing in salt/yeast: You want a shaggy dough at first, not a super smooth one. Overworking it early on can make it tough.
- Not preheating your oven/pizza stone long enough: A hot surface is essential for that crispy bottom crust. Don’t skimp on preheating time!
- Adding too many toppings: Piling on too many toppings can weigh down your pizza, making the crust soggy and difficult to cook through. Less is often more!
How to Store artisan pizza dough- crispy, chewy, bubbly crust
- Refrigerated Dough Balls: Cover tightly with plastic wrap and refrigerate for up to 2 days. This is great for making ahead!
- Baked Pizza: Store leftover slices in an airtight container in the refrigerator for 3-4 days. Reheat in a hot oven or toaster oven for best results.
Frequently Asked Questions
What kind of flour should I use?
All-purpose flour works perfectly for this recipe. You don’t need special bread flour unless you prefer it.
Can I use instant yeast instead of active dry yeast?
Yes, you can! You can usually substitute instant yeast for active dry yeast in equal amounts, and you don’t need to dissolve it in water first; you can just mix it directly with the flour.
How do I know if my water is the right temperature?
The water should feel warm to the touch, like a comfortable bath. If you have a thermometer, aim for 100-110°F (38-43°C).
Can I freeze the dough?
The recipe does not specify freezing instructions, but generally, shaped dough balls can be frozen for longer storage. Thaw in the refrigerator overnight before using.
My dough isn’t doubling in volume, what went wrong?
This usually means your yeast wasn’t active. Check your water temperature (too hot or too cold can kill it) or your yeast might be old. Make sure your kitchen isn’t too cold either.
I genuinely hope this artisan pizza dough – crispy, chewy, bubbly crust – brings so much joy and deliciousness to your kitchen! It’s a game-changer for homemade pizza night. Give it a try, and I can’t wait to hear how your perfect pizzas turn out!
Printartisan pizza dough- crispy, chewy, bubbly crust

Achieve the perfect crispy, chewy, bubbly pizza crust at home with this simple artisan dough recipe.
- Prep Time: 20
- Cook Time: 10
- Total Time: 470
- Yield: 2 (12-inch) pizzas
- Category: Baking
- Method: Baking
- Cuisine: Italian
- Diet: Vegetarian
Ingredients
- 500g (3 3/4 cups plus 2 tbsp) all-purpose flour
- 375g (1 1/2 cups water plus 2 tbsp) warm water, divided
- 1g (1/4 tsp) active dry yeast
- 10g (1 1/2 tsp) fine salt
Instructions
- Combine flour and all but 1 tablespoon of the water in a large bowl until just combined.
- Cover the bowl.
- Set aside for 20 minutes to rest.
- Sprinkle yeast over remaining warm water.
- Set aside to dissolve.
- Sprinkle salt over the surface of the dough.
- Stir yeast mixture.
- Pour yeast mixture over dough.
- Lightly wet your hand.
- Reach under the dough.
- Stretch a section of the dough over the top.
- Repeat folding until the center of the dough is covered.
- Using your thumb and fingers as pincers, squeeze and pinch off 5-6 chunks of dough.
- Wet your hand to minimize sticking.
- Fold the dough over itself a few times.
- Repeat pinching and folding until the yeast and salt are fully mixed and a shaggy dough is formed.
- Cover the bowl.
- Let rest about an hour.
- Lightly wet your hand.
- Reach underneath the dough.
- Stretch up a section of the dough.
- Fold it over the center.
- Rotate the bowl.
- Fold four to five more times until the dough has tightened into a ball.
- Take the entire ball of dough.
- Invert it into a clean, lightly greased bowl so the seam is down and the top is smooth.
- Cover and let rise until doubled in volume, 5-6 hours.
- Turn the dough out onto a floured work surface.
- Cut the dough in half.
- Work with one piece of dough at a time.
- Stretch out a quarter of the dough just until you feel resistance.
- Fold it back over the center.
- Repeat stretching and folding the remaining three edges until the center is covered and a loose ball is formed.
- Turn the ball over so the seam is down.
- Place it on an un-floured area.
- Cup your hands around the dough.
- Gently pull the dough towards you, dragging the bottom along the counter to create tension.
- Rotate the ball 90 degrees.
- Drag it a few inches towards you again.
- Repeat rotating and gently dragging until the top of the dough tightens up and the ball is round.
- Transfer to a greased plate.
- Repeat with remaining dough.
- Lightly oil the tops of the dough balls.
- Cover and let rest at room temperature for about an hour.
- Preheat oven at this time.
- If not using right away, cover tightly with plastic wrap and refrigerate until ready (for up to 2 days).
- To make pizza: Place pizza steel, stone, or inverted baking sheet on the middle rack of the oven.
- Preheat oven to 500°F (or as high as it will go).
- Let oven heat up for at least 45 minutes.
- Generously flour a pizza peel and set aside.
- Alternatively, lightly grease a cast iron pan with olive oil and set aside.
- Place one dough ball on a floured surface.
- Flatten the middle into a large disk, leaving a thick 1-inch lip.
- Pick up the disk.
- Holding the thick edge, use gravity to gently shape the dough into a 12-inch circle.
- Lay on prepared pizza peel.
- Adjust shape into a circle.
- Jiggle the peel to make sure the dough isn’t sticking.
- Add more flour if it is sticking.
- Alternatively, shape the dough to the size of your prepared cast iron pan.
- Place dough inside the cast iron pan.
- Add sauce and toppings to pizza dough, leaving the 1-inch perimeter empty.
- Slide pizza onto the hot steel.
- Bake for 5 minutes.
- Turn on the broiler.
- Broil for 2-4 minutes, or until cheese is melted and crust is golden and blistered.
- If using the cast iron pan, bake for 15-20 minutes.
- Broil for the last few minutes to get spots of char.
- Repeat with remaining pizza dough and toppings.
Notes
Use a kitchen scale for precise measurements of flour and water.
Ensure your water is warm (100-110°F) to properly activate the yeast.
Don’t rush the resting and rising times; they are crucial for flavor and texture.
Preheat your oven and pizza stone/steel thoroughly for the best crispy crust.

![Easy Southern Peach Cobbler [with Canned Peaches]](https://theflakytruth.com/wp-content/uploads/2026/08/cmswa1vwj00lb102k5xxpcxh8-hero-768x768.webp)

![Easy Southern Peach Cobbler [with Canned Peaches]](https://theflakytruth.com/wp-content/uploads/2026/08/cmswa1vwj00lb102k5xxpcxh8-hero-300x300.webp)