Some recipes just transport you back in time, don’t they? For me, these Old-Fashioned Date Balls are pure nostalgia. They bring back memories of my grandma’s kitchen during the holidays, a sweet little treat always waiting in a tin. They’re so simple, yet so incredibly delicious, and every bite feels like a warm hug. I just adore how easy they are to whip up, and they’re always a hit with everyone who tries them!
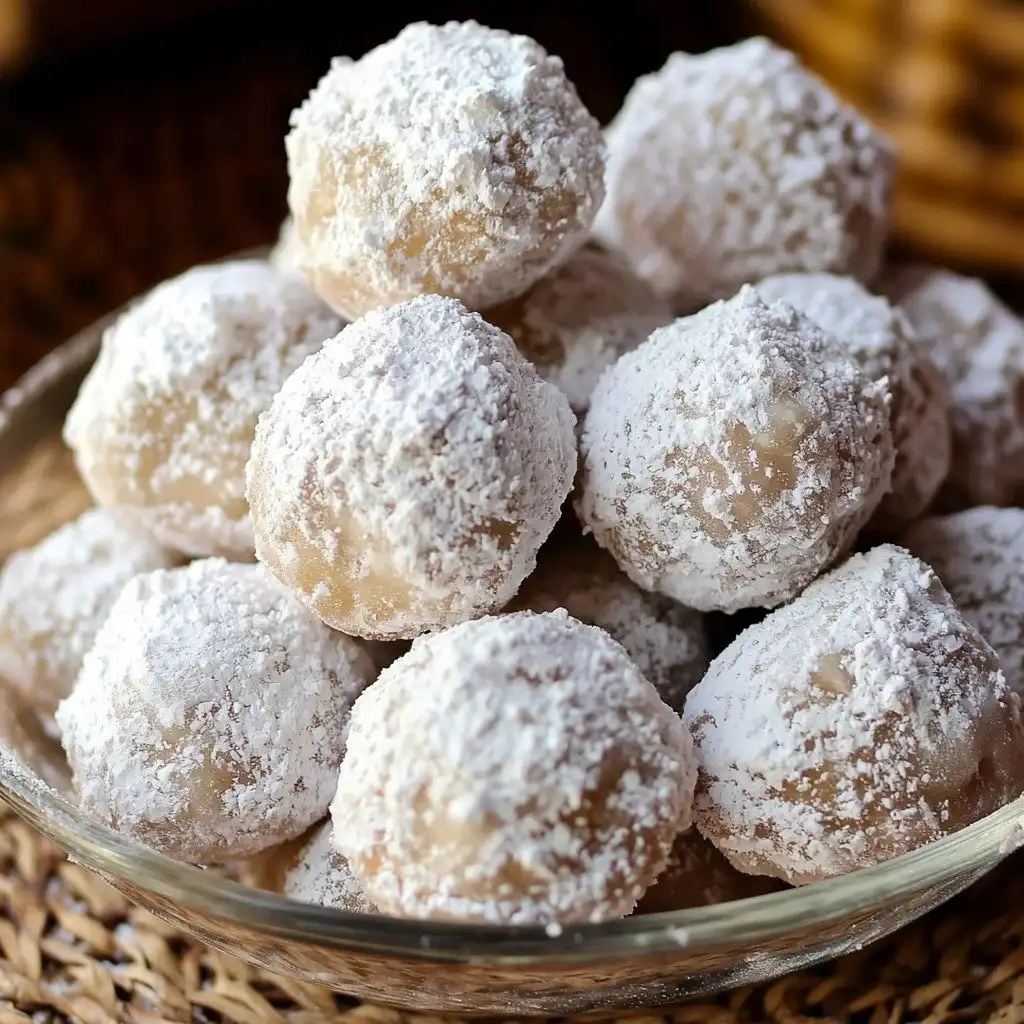
Why You’ll Love These Old-Fashioned Date Balls
- They’re incredibly easy to make, no baking required! Perfect for a quick treat.
- The texture is amazing – a delightful chewiness from the dates with a satisfying crunch from the pecans and cereal.
- That classic, comforting flavor is just irresistible, a perfect balance of sweet and nutty.
- They’re wonderful for holidays, potlucks, or just a sweet snack anytime you need a little pick-me-up.
Ingredients You’ll Need
- Butter: This provides the rich base and helps bind everything together. I always use unsalted butter so I can control the saltiness.
- White Granulated Sugar: Our main sweetener! It dissolves into the butter and dates to create that wonderful sticky coating.
- Pitted Dates: The star of the show! Make sure they’re finely chopped. Trust me, avoid the pre-chopped ones that are coated to prevent stickiness – they won’t work as well here for binding.
- Pecans: These add a lovely nutty flavor and crunch. Finely chopped is key for an even distribution.
- Vanilla Extract: Just a touch enhances all the other flavors. Use a good quality pure vanilla extract if you can!
- Crisped Rice Cereal: This gives the date balls their signature crispy texture. Don’t skip it!
- Powdered Sugar: For dusting! It adds a pretty finish and an extra touch of sweetness.
How to Make Old-Fashioned Date Balls Step by Step
First things first, let’s get those dates and pecans ready. You really want them finely chopped for the best texture and to help everything stick together. I find a food processor works wonders here – just a few pulses and you’re good to go! And a little tip from me: make sure your dates are plain, not the kind that are coated to prevent stickiness. Those don’t bind as well, and we want nice, cohesive balls.
Next, we’re heading to the stovetop. Grab a saucepan and melt your butter over medium-low heat. Once it’s melted, stir in the granulated sugar and your finely chopped dates. Keep stirring gently until that sugar has completely dissolved. This step is important for creating that sticky, sweet base. Don’t rush it; just let it all melt together beautifully.
Once the sugar is dissolved, take the pan off the heat. Now for the fun part! Stir in the vanilla extract, your finely chopped pecans, and the crisped rice cereal. Use a non-stick spatula to really combine everything well. It might look a little loose at first, but keep stirring until it’s all incorporated. Let this mixture cool for several minutes. It needs to be cool enough to handle, but still warm enough to be pliable. This is where the magic happens and everything comes together!
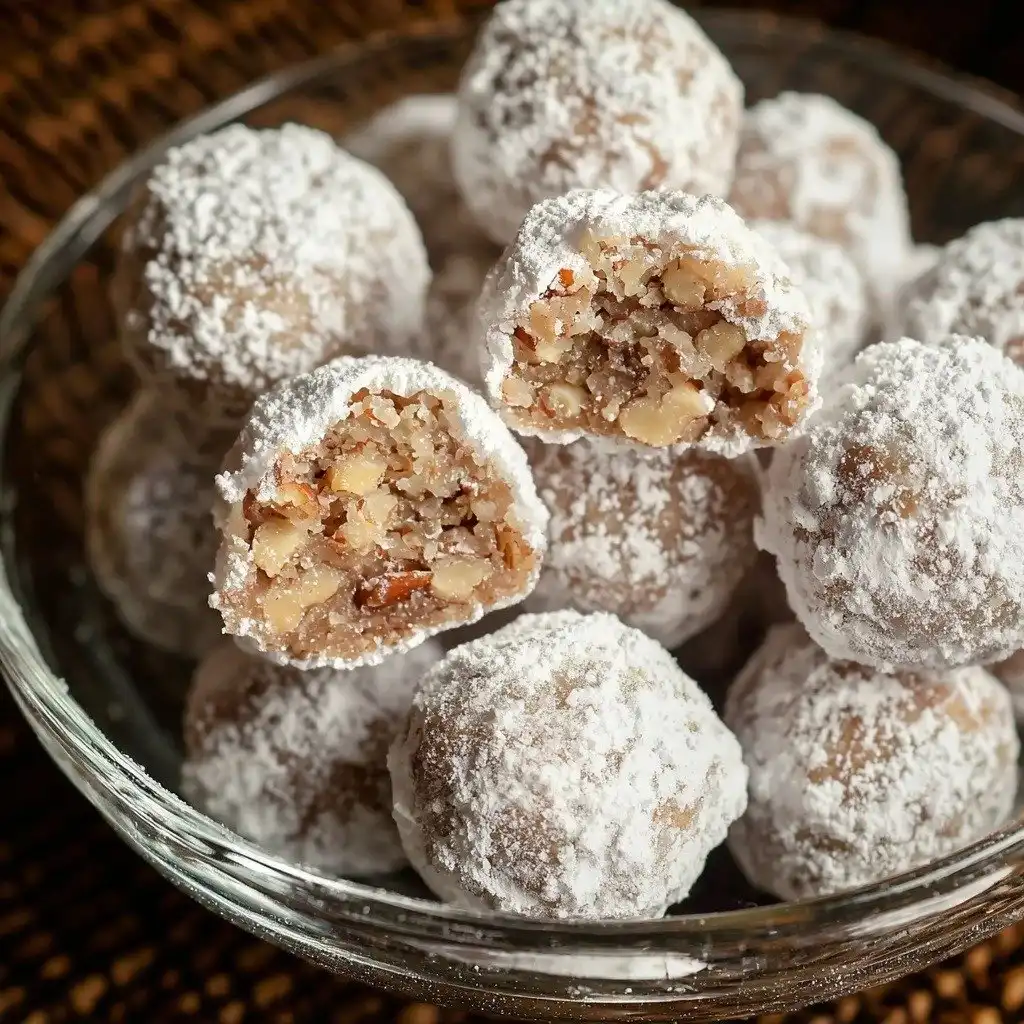
My Top Tips for Success
- I always make sure my dates and pecans are super finely chopped. It makes a huge difference in the texture and how well the balls hold their shape.
- In my experience, using plain pitted dates (not the coated kind) is crucial for the best binding. Trust me on this one!
- Don’t rush the sugar dissolving step on the stovetop. Low and slow is the way to go for a smooth, sticky base.
- Let the mixture cool down a bit before you start rolling. It makes it much easier to handle and prevents burnt fingers!
- I find dusting with powdered sugar in a shallow bowl works best for an even coating, but a light sprinkle is fine too.
- Press the mixture firmly when forming the balls to ensure they don’t crumble apart.
Common Mistakes to Avoid
- Not chopping dates and pecans finely enough: This can lead to crumbly balls that don’t hold together well. Use a food processor for best results.
- Using pre-chopped dates with an anti-stick coating: These dates will prevent your mixture from binding properly, resulting in a loose texture. Always opt for plain pitted dates.
- Not letting the sugar fully dissolve: If the sugar isn’t dissolved, your date balls can be grainy and less cohesive. Stir patiently over medium-low heat.
- Trying to roll the mixture when it’s too hot: The mixture will be too soft and sticky to handle, making rolling difficult. Allow it to cool for several minutes until it’s warm but manageable.
- Not pressing the balls firmly enough: Gentle handling can lead to balls that fall apart. Compress the mixture well as you roll each one.
How to Store Old-Fashioned Date Balls
- Countertop: 3-5 days in an airtight container at room temperature.
- Refrigerator: Up to 2 weeks in an airtight container. They firm up a bit when chilled!
- Freezer: Up to 3 months in a freezer-safe airtight container. Thaw at room temperature before serving.
Frequently Asked Questions
Can I use different nuts in Old-Fashioned Date Balls?
Absolutely! While pecans are traditional, walnuts or even almonds would be delicious. Just make sure they are finely chopped.
Do I have to use crisped rice cereal?
Yes, the crisped rice cereal is key for the unique texture and crunch of these date balls. Substituting it would change the recipe significantly.
Can I make these Old-Fashioned Date Balls ahead of time for holidays?
Definitely! These are a fantastic make-ahead treat. They store well in the refrigerator for up to two weeks, making them perfect for holiday prep.
Why are my date balls not sticking together?
This is usually because the dates weren’t chopped finely enough, or you used dates with an anti-stick coating. Ensure your dates are plain and very finely minced.
I hope these Old-Fashioned Date Balls bring a little bit of that old-fashioned comfort and joy to your kitchen! They truly are a delightful, no-fuss treat that everyone adores. Give them a try, and let me know how they turn out – I’d love to hear from you!
PrintOld-Fashioned Date Balls

Sweet, chewy, and delightfully crunchy, these no-bake date balls are a classic confection perfect for snacks or holiday treats.
- Prep Time: 20
- Cook Time: 5
- Total Time: 25
- Yield: about 24-30 balls
- Category: Dessert
- Method: No-Bake
- Cuisine: American
- Diet: Vegetarian
Ingredients
- 1/2 cup (1 stick) butter
- 3/4 cup white granulated sugar
- 8 ounces pitted dates, finely chopped
- 1 cup pecans, finely chopped
- 1 tsp vanilla extract
- 2 cups crisped rice cereal
- Powdered sugar, for dusting or rolling
Instructions
- Finely chop the pitted dates.
- Finely chop the pecans.
- In a saucepan, melt the butter over medium-low heat.
- Add the granulated sugar to the melted butter.
- Add the finely chopped dates to the saucepan.
- Cook the mixture, stirring constantly, until the sugar has fully dissolved.
- Remove the saucepan from the heat.
- Stir in the vanilla extract.
- Stir in the finely chopped pecans.
- Stir in the crisped rice cereal.
- Combine all ingredients thoroughly with a non-stick spatula.
- Let the mixture cool for several minutes until warm but handleable.
- Use your hands to form the mixture into 1-inch balls.
- Place the formed balls on parchment paper or a baking sheet.
- Dust the balls lightly with powdered sugar.
- Alternatively, roll the balls in a bowl of powdered sugar to coat completely.
- Store the Old-Fashioned Date Balls in an airtight container.
Notes
Ensure dates are finely chopped; a food processor works best.
Avoid pre-chopped dates with anti-stick coatings as they won’t bind well.
Let the mixture cool slightly before rolling to prevent sticking and burning.
For best results, press the mixture firmly when forming balls to ensure they hold their shape.


![Easy Southern Peach Cobbler [with Canned Peaches]](https://theflakytruth.com/wp-content/uploads/2026/08/cmswa1vwj00lb102k5xxpcxh8-hero-300x300.webp)