Christmas is my absolute favorite time of year, and nothing says “holiday cheer” quite like a kitchen filled with the aroma of freshly baked cookies. Every December, I pull out my favorite festive sprinkles and get ready to create something truly magical. These Swirled Christmas Cookies are a tradition in our house, bringing smiles and a touch of homemade warmth to everyone who tries them. They’re so vibrant and fun, and honestly, they taste even better than they look!
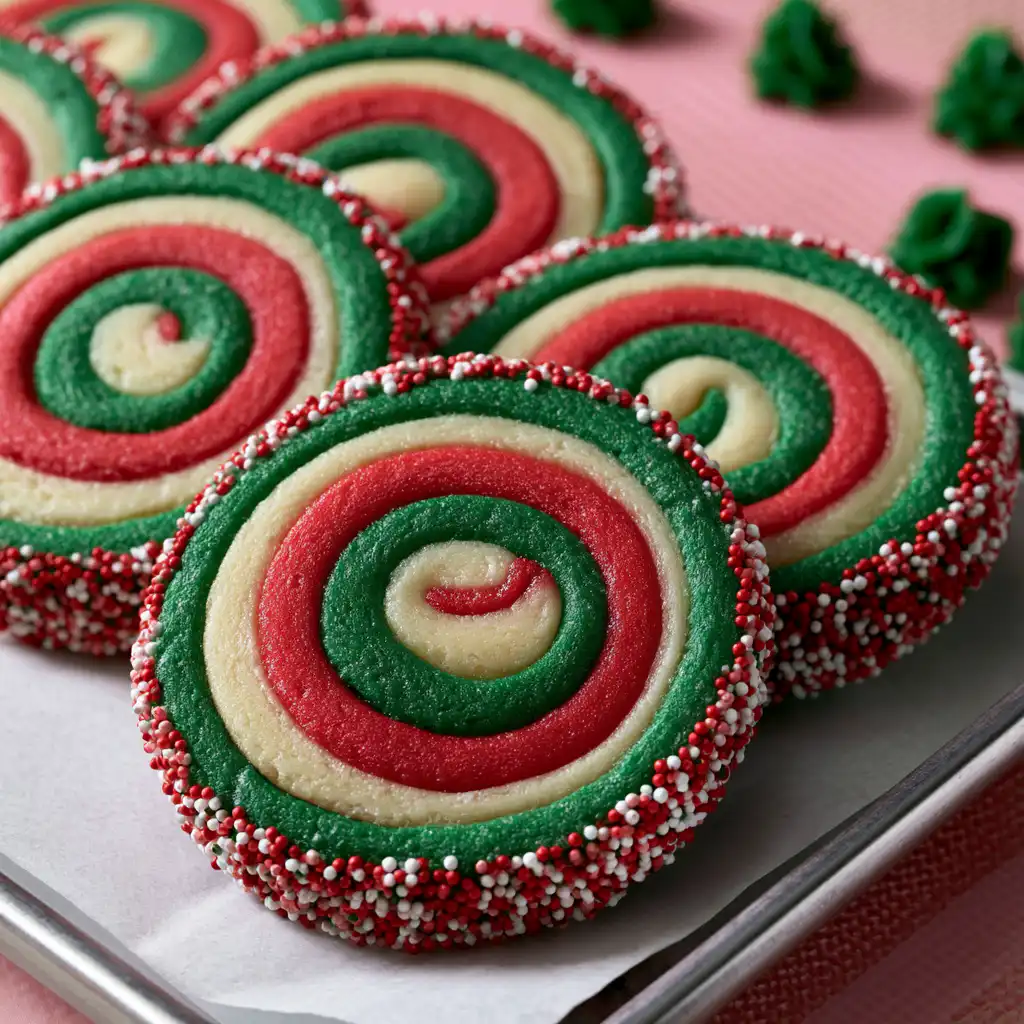
Why You’ll Love These Swirled Christmas Cookies
- These cookies are incredibly festive and beautiful, making them perfect for holiday platters.
- The almond and vanilla extracts give them such a delicious, classic cookie flavor.
- They’re surprisingly fun to make, and the swirling technique is easier than you might think!
- The texture is wonderfully tender and buttery, just melting in your mouth.
Ingredients You’ll Need
- Unsalted Butter: Make sure your butter is at room temperature. This helps it cream beautifully with the sugar, giving your cookies that light, fluffy texture. Don’t use cold butter or melted butter!
- Granulated Sugar: Our main sweetener! It helps with texture and crispness too.
- Large Egg: Also needs to be at room temperature. It binds everything together and adds richness.
- Almond Extract: This is a secret weapon for amazing flavor! It really elevates these cookies.
- Vanilla Extract or Vanilla Bean Paste: Either works great! Vanilla adds that classic cookie warmth.
- All-Purpose Flour: The structure of our cookies. Don’t pack it into the measuring cup!
- Cornstarch: This is a little trick to make your cookies extra tender and soft. Trust me on this one!
- Baking Powder: Just a touch for a little lift, keeping them light.
- Fine Salt: Balances out the sweetness and enhances all the other flavors.
- Christmas Sprinkles: Nonpareils or jimmies work best for coating. They stick well and add that festive crunch.
- Red and Green Gel Food Coloring: Gel coloring is key here! It gives vibrant colors without adding too much liquid to your dough, which can change the texture.
How to Make Swirled Christmas Cookies Step by Step
First things first, get your butter and sugar creaming together in a big bowl until it’s light and fluffy. This step is super important for the final texture of your cookies! Then, you’ll add in your egg and those lovely extracts, mixing until everything is beautifully combined. Don’t forget to scrape down the sides of the bowl with your spatula to make sure no bits are left out.
Next up, it’s time for the dry ingredients: flour, cornstarch, baking powder, and salt. Mix these into your wet ingredients on low speed until they are just, and I mean just, incorporated. Overmixing here can make your cookies tough, so stop as soon as you see no more dry streaks. The dough will be thick, which is exactly what we want!
Now for the fun part – coloring! Divide your dough into three equal portions. Leave one plain, then use your red and green gel food coloring to transform the other two. Wrap each colored dough in plastic wrap, flattening it into a rectangle. This makes it easier to roll later. Pop them in the fridge to chill for about 30 minutes, or even overnight if you’re planning ahead. Chilling is crucial for the dough to be firm enough to handle and hold its shape beautifully. While they’re chilling, preheat your oven to 350°F (175°C) and line your baking sheets. This is where the magic starts to happen!
My Top Tips for Success
- I always make sure my butter and egg are at room temperature. It makes such a difference in the dough’s texture.
- In my experience, gel food coloring gives the best vibrant colors without thinning out the dough.
- Trust me on this one: chilling the dough is not optional! It prevents spreading and makes it much easier to roll and cut.
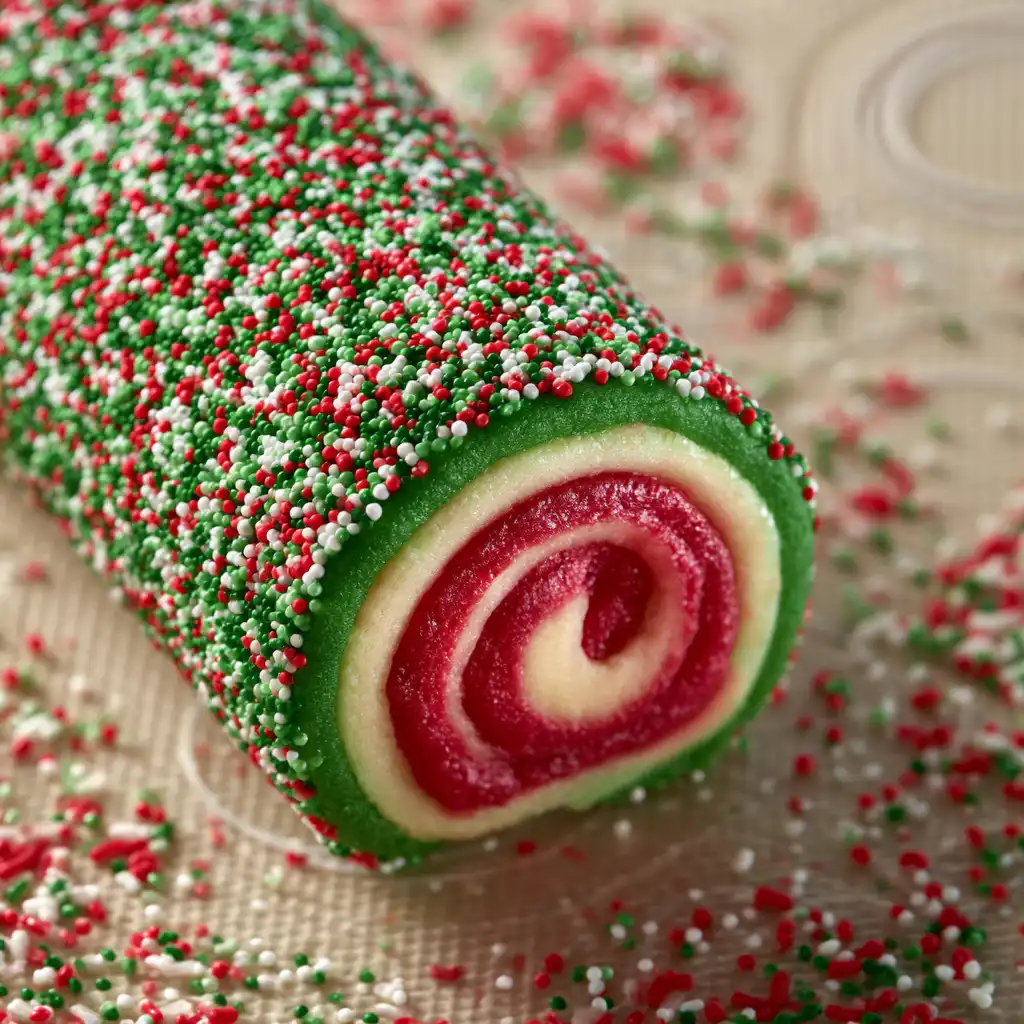
- When rolling the log, use the parchment paper to help you get a really tight spiral. This creates those beautiful swirls.
- Don’t overbake! Pull the cookies out just before the edges start to brown. They’ll continue to set on the pan.
- Rotate your baking sheet halfway through baking for even cooking.
Common Mistakes to Avoid
- Overmixing the dough: This can activate too much gluten, resulting in tough, chewy cookies instead of tender ones. Mix only until just combined.
- Not chilling the dough enough: If the dough is too warm, it will be sticky and hard to roll, and your cookies will spread excessively in the oven, losing their swirl shape. Always chill as directed.
- Using liquid food coloring: Liquid food coloring can change the consistency of your dough, making it too wet. Stick to gel food coloring for vibrant colors and proper dough texture.
- Cutting thick slices: If your slices are too thick, they won’t bake evenly and might be raw in the middle or overdone on the outside. Aim for about 1/3 inch thickness.
- Overbaking the cookies: This will make your cookies dry and hard. Remove them from the oven when the edges are set but the centers still look soft.
How to Store Swirled Christmas Cookies
- Room Temperature: Store in an airtight container for up to 5 days.
- Freezing Dough: You can form the log and wrap it tightly in plastic wrap, then foil. Freeze for up to 2-3 months. Thaw in the fridge overnight before slicing and baking.
- Freezing Baked Cookies: Place cooled cookies in a single layer on a baking sheet to freeze solid, then transfer to an airtight freezer-safe container or bag for up to 1 month. Thaw at room temperature.
Frequently Asked Questions
What kind of sprinkles work best for these cookies?
I find that nonpareil sprinkles or jimmies work best. They adhere well to the dough and create a beautiful, festive coating. Other types of sprinkles might not stick as easily or give the same textured look.
Can I make these cookies ahead of time?
Absolutely! The dough can be chilled in the fridge overnight, or even for up to 2-3 days. You can also freeze the raw dough log for longer storage. This makes holiday baking much less stressful.
Why are my cookies spreading too much?
Cookies usually spread too much if the dough isn’t chilled enough, or if your oven temperature isn’t accurate. Make sure your butter isn’t too soft when you start, and always chill the dough for the recommended time. You can also try chilling the cut cookies for 10-15 minutes before baking.
Can I use different flavor extracts?
While I love the almond and vanilla combination, you can certainly experiment! Peppermint extract would be lovely for a more minty Christmas cookie, or even a touch of orange zest. Just be mindful of the quantity of strong extracts. For more cookie ideas, check out these Christmas Sugar Cookies Recipe.
How do I get a really tight swirl?
The trick to a tight swirl is to start rolling the dough from the angled edge and use the parchment paper to help you. Gently pull up the paper as you roll, keeping the log as compact as possible. Pressing firmly and evenly makes a big difference.
I truly hope these Swirled Christmas Cookies bring a little extra sparkle and joy to your holiday season. They’re such a delightful treat to share with loved ones or keep all to yourself (no judgment here!). If you try this recipe, please let me know how they turn out – I absolutely love hearing from you!
PrintSwirled Christmas Cookies

Festive and fun, these buttery Swirled Christmas Cookies are bursting with holiday colors and a delicious almond-vanilla flavor, perfect for sharing.
- Prep Time: 45
- Cook Time: 14
- Total Time: 59
- Yield: 36-40 cookies
- Category: Dessert
- Method: Baking
- Cuisine: American
Ingredients
- 1 cup (2 sticks) unsalted butter, room temperature
- 1 1/4 cups granulated sugar
- 1 large egg, room temperature
- 2 tsp almond extract
- 1 tsp vanilla extract or vanilla bean paste
- 3 cups all-purpose flour
- 1 tsp cornstarch
- 1 tsp baking powder
- 1 tsp fine salt
- 1 cup Christmas sprinkles
- red gel food coloring
- green gel food coloring
Instructions
- Beat butter and sugar: In a large bowl or stand mixer, beat 1 cup (2 sticks) unsalted butter and 1 1/4 cups granulated sugar on medium-high speed for a couple of minutes until lighter in color.
- Add wet ingredients: Add 1 large egg, 2 tsp almond extract, and 1 tsp vanilla extract or vanilla bean paste. Mix on medium speed until incorporated.
- Scrape bowl: Scrape the sides and bottom of the bowl with a rubber spatula as needed.
- Add dry ingredients: Add 3 cups all-purpose flour, 1 tsp cornstarch, 1 tsp baking powder, and 1 tsp fine salt to the butter mixture.
- Mix dough: Mix at a low speed until the dry ingredients are JUST incorporated.
- Scrape bowl again: Scrape the sides and bottom of the bowl with a rubber spatula to ensure everything is properly mixed.
- Divide dough: Divide the dough into three equal-sized portions (about 10.75 oz. or 305g each).
- Color dough: Leave one portion uncolored. Use red gel food coloring to color one portion red and green gel food coloring to color the other portion green.
- Shape dough portions: Wrap each portion of dough in plastic wrap. Flatten each dough portion into a rectangle that is about 1/3 inch tall.
- Chill dough: Chill the dough in the fridge for about 30 minutes, in the freezer for 10 minutes, or in the fridge overnight. If chilled overnight, let it sit out at room temperature for about 5 minutes before rolling.
- Preheat oven: Preheat the oven to 350°F (175°C) 30 minutes before cutting cookies.
- Prepare baking sheets: Line two large baking sheets with silicone baking mats or parchment paper. Set aside.
- Prepare rolling surface: Unwrap each portion of cookie dough and lay the plastic wrap flat on your counter.
- Roll dough: Roll out each portion of chilled dough to be about 7×12 inches.
- Stack dough: Lay out a piece of parchment paper. Stack the rolled dough on the parchment paper in this order: green on the bottom, white in the middle, and red on top.
- Roll stacked dough: Use a rolling pin to gently roll over the stacked cookie dough to stick the layers together.
- Trim edges: Trim the edges with a sharp knife to remove any uneven parts.
- Angle cut: Cut one of the long sides at an angle so that you have slightly less red than green on that edge.
- Roll log: Carefully roll the cookie dough into a long log with a tight spiral, starting from the angled edge. Use the parchment paper to help roll the dough onto itself.
- Seal log: Use your finger to gently spread the green cookie dough over the seam and seal the log.
- Coat with sprinkles: Pour 1 cup of Christmas sprinkles into a rimmed baking sheet. Roll and firmly press the cookie dough log in the sprinkles until it is fully coated.
- Slice cookies: Use a sharp knife to slice cookies about 1/3 inch thick. If the log softens, chill it for 15-30 minutes.
- Arrange cookies: Place the sliced cookies on the prepared baking sheets, spacing them about 2 inches apart.
- Bake cookies: Bake one sheet of cookies at a time for 12-14 minutes on the middle rack of your oven. Rotate the pan halfway through for even baking.
- Check for doneness: Pull cookies out before the edges start to brown. They will continue to firm up on the pan as they cool.
- Cool cookies: Let the cookies cool on the pan for 15 minutes, then move them to a wire rack to finish cooling completely.
- Enjoy: Let the baked cookies cool fully, then enjoy!
Notes
Ensure butter and egg are at room temperature for best results.
Gel food coloring provides vibrant colors without altering dough consistency.
Do not skip chilling the dough; it’s crucial for shape and handling.
For a tight spiral, use the parchment paper to assist in rolling the log.
Do not overbake; cookies should be soft in the center when removed from the oven.


![Easy Southern Peach Cobbler [with Canned Peaches]](https://theflakytruth.com/wp-content/uploads/2026/08/cmswa1vwj00lb102k5xxpcxh8-hero-300x300.webp)