My grandma always said the best things come in small packages, and she wasn’t wrong! There’s something so comforting about a homemade treat that fits perfectly in your hand. These Blueberry Hand Pies are exactly that – a little parcel of pure joy, bursting with sweet, juicy blueberries and wrapped in a flaky, tender crust. They remind me of summer days and simple pleasures, and they’re just so satisfying to bake and share.
Why You’ll Love These Blueberry Hand Pies
- Flaky, buttery crust: It’s just divine and melts in your mouth.
- Sweet and tangy blueberry filling: The perfect balance of flavors.
- Perfectly portable: Great for picnics, lunchboxes, or a quick treat.
- So satisfying to make: You’ll feel like a baking pro!
Ingredients You’ll Need
- Cold butter: This is key for a flaky crust! Don’t let it get warm.
- Ice water: Keeps the dough cold and prevents it from becoming tough.
- Cornstarch: Helps thicken the blueberry filling so it’s not too runny.
- Lemon juice: Brightens up the blueberries and adds a lovely tang to both the filling and the glaze.
- Powdered sugar: Creates a smooth, pourable glaze. Regular granulated sugar won’t work here.
How to Make Blueberry Hand Pies Step by Step
Let’s get baking! First, we’ll tackle the crust. Your food processor is your best friend here. Just combine the flour, salt, and sugar, then add your cold, cubed butter. Pulse it until the butter is about the size of peas. This is where that flakiness comes from!
Next, slowly add the ice water, a tablespoon at a time, pulsing after each addition. You’ll see the dough start to come together. Once it forms a ball, divide it in half, flatten each half into a disc, wrap them up, and pop them in the fridge. This chill time is super important for a tender crust, so don’t skip it!
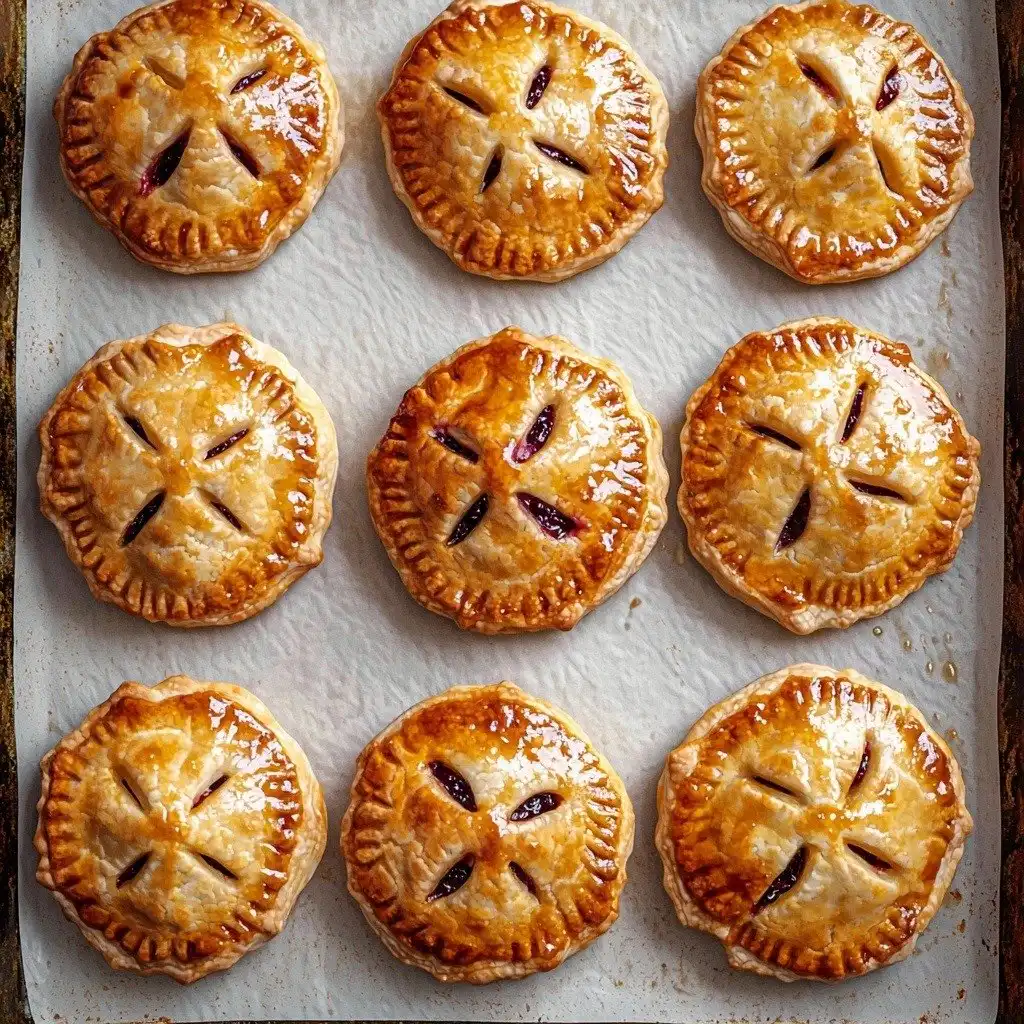
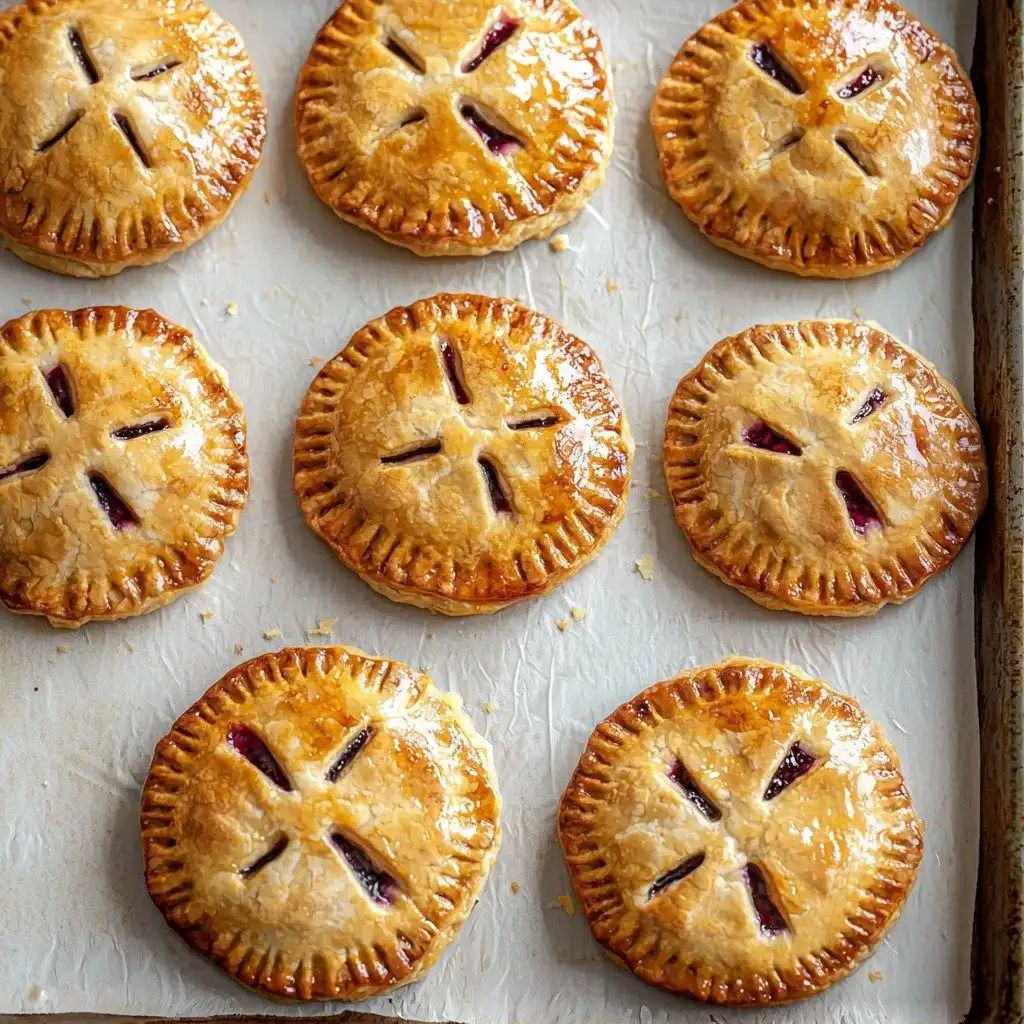
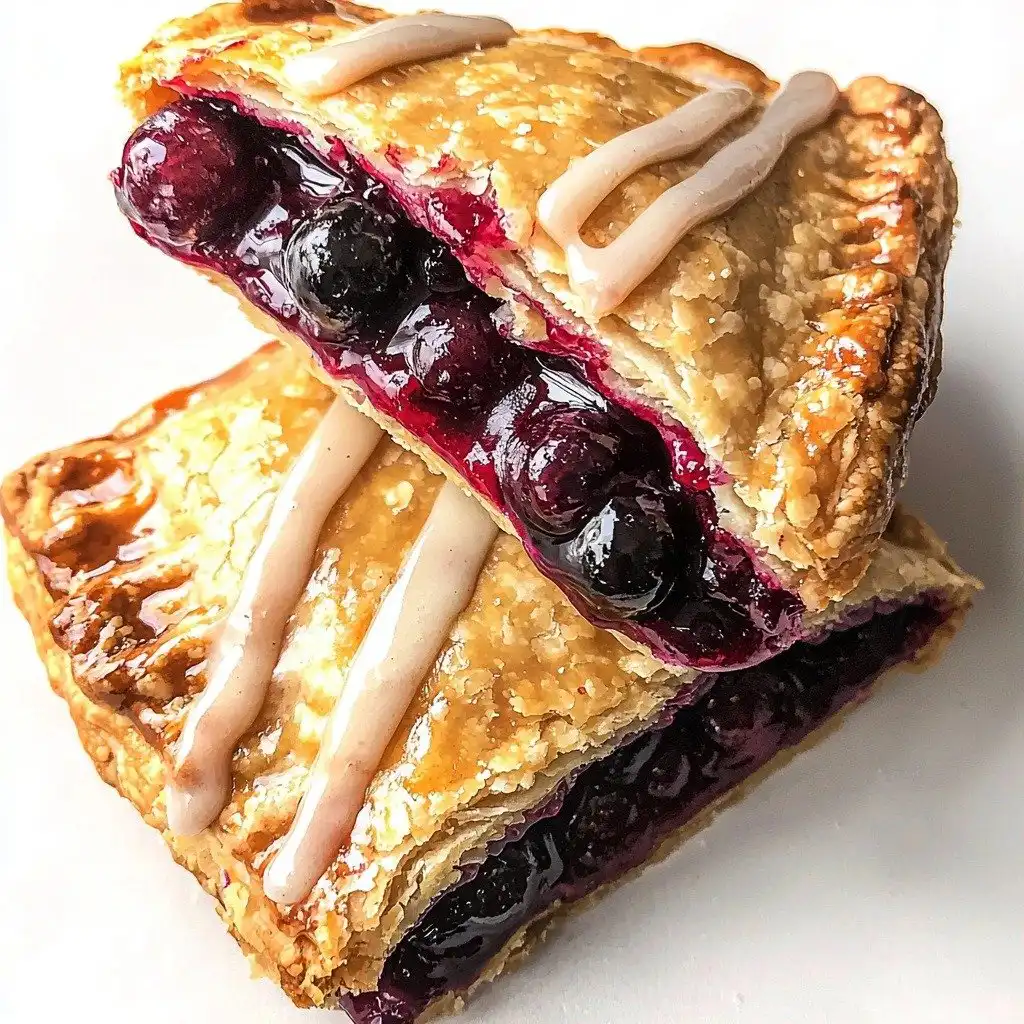
While your dough is chilling, you can get the filling ready. Just gently toss your fresh blueberries with sugar, cornstarch, and a splash of lemon juice. It’s so simple! Then, when your dough is ready, roll it out, cut your circles, fill them with those delicious blueberries, and seal them up with a fork. Don’t worry if they’re not perfectly uniform; homemade is always best! Brush them with an egg wash for that beautiful golden shine, and into the oven they go. Bake them until they’re golden brown and irresistible!
My Top Tips for Success
- I always make sure my butter is *really* cold for the crust; it makes all the difference for flakiness.
- In my experience, don’t overwork the dough. Just pulse until it comes together, and then stop.
- Trust me on this one: chilling the dough for at least an hour helps prevent shrinking and makes it easier to handle.
- Don’t overcrowd your baking sheet; give your hand pies some space to bake evenly.
- For a neat seal, press firmly with a fork around the edges of the hand pies.
Common Mistakes to Avoid
- Warm butter: If your butter is too warm, your crust won’t be flaky. Make sure it’s cold and cut into small cubes.
- Overworking the dough: This develops too much gluten, making your crust tough. Pulse just until the dough comes together.
- Too much filling: Overfilling can cause the pies to burst during baking. Stick to 1-2 tablespoons per pie.
- Not sealing the edges properly: This can lead to the filling leaking out. Use a fork to crimp the edges firmly.
- Skipping the egg wash: The egg wash gives the pies that beautiful golden-brown color and a lovely shine.
How to Store Blueberry Hand Pies
- Countertop: 1-2 days in an airtight container at room temperature.
- Refrigerator: 3-4 days in an airtight container.
- Freezer (baked): Up to 1 month. Thaw at room temperature and warm gently in the oven if desired.
- Freezer (unbaked): Assemble pies, freeze on a baking sheet until solid, then transfer to a freezer-safe bag for up to 2 months. Bake from frozen, adding a few minutes to the bake time.
Frequently Asked Questions
Can I use frozen blueberries?
Yes, you can use frozen blueberries! Do not thaw them before tossing them with the sugar, cornstarch, and lemon juice. This helps prevent the filling from becoming too watery.
What if my dough is too dry?
If your dough still seems dry after adding the ⅓ cup of ice water, you can add a tiny bit more, about a teaspoon at a time, pulsing until it comes together. Be careful not to add too much.
Why did my hand pies open during baking?
This usually happens if the edges weren’t sealed firmly enough or if the pies were overfilled. Make sure to crimp the edges well with a fork and don’t overstuff them.
Can I make these ahead of time?
Absolutely! You can prepare the dough and chill it for up to 2 days, or assemble the unbaked pies and freeze them. You can also bake them a day in advance and store them.
Can I use other fruits for the filling?
Yes, you can! This recipe works well with other berries like raspberries or mixed berries. Adjust sugar and cornstarch as needed based on the fruit’s juiciness.
I hope you give these Blueberry Hand Pies a try! They’re such a delightful treat, and I know you’ll love making them. If you do, please come back and let me know how they turned out!
PrintBlueberry Hand Pies

These delightful hand pies feature a flaky, buttery crust filled with a sweet and tangy blueberry mixture, perfect for a portable treat.
- Prep Time: 30
- Cook Time: 20
- Total Time: 110
- Yield: 10-12 hand pies
- Category: Dessert
- Method: Baking
- Cuisine: American
- Diet: Vegetarian
Ingredients
- 2½ cups unbleached all purpose flour
- 1 teaspoon salt
- 1 tablespoon sugar
- 1 cup cold butter, cubed
- ⅓ cup ice water
- 1½ cups blueberries
- 2 tablespoons sugar
- 3 tablespoons cornstarch
- 1 tablespoon lemon juice
- 1 egg, for egg wash
- 2 cups powdered sugar
- ¼ cup lemon juice
Instructions
- Add flour, salt, and 1 tablespoon sugar to a food processor.
- Cut the cold butter into small cubes.
- Add the cubed butter to the food processor.
- Pulse the food processor until the butter resembles the size of peas.
- Measure out ⅓ cup of ice water.
- Slowly add the ice water to the food processor, 1 tablespoon at a time.
- Pulse between each water addition until the dough comes together.
- If the dough is still dry, pulse a little longer until it forms a cohesive mass.
- Divide the dough in half.
- Place one half of the dough onto a piece of plastic wrap.
- Form the dough into a disc as you wrap it.
- Repeat with the other half of the dough.
- Place both dough discs in the refrigerator for at least 1 hour.
- In a medium bowl, toss the blueberries with 2 tablespoons sugar, cornstarch, and 1 tablespoon lemon juice.
- Set the blueberry filling aside.
- In a small bowl, beat one egg to make an egg wash.
- Set the egg wash aside.
- Preheat your oven to 400°F (200°C).
- Remove one disc of dough from the refrigerator.
- Sprinkle a few tablespoons of flour onto a clean surface.
- Roll out the dough until it is ¼ inch thick.
- Using a 4-inch cookie cutter, cut out circles from the dough.
- Place the circles on a baking sheet lined with parchment paper.
- Roll out any leftover dough scraps and cut out more circles.
- Brush the edges of each dough circle with egg wash.
- Place 1 to 2 tablespoons of blueberry filling in the middle of one dough circle.
- Place a second dough circle on top of the filling.
- Use a fork to firmly seal the edges of the hand pie.
- Brush the tops of the assembled hand pies with egg wash.
- Bake for 15 to 20 minutes until golden brown.
- Transfer the baked hand pies to a cooling rack.
- To make the glaze, whisk the powdered sugar and ¼ cup lemon juice together in a bowl.
- Drizzle the glaze over the top of each cooled hand pie.
- Let the hand pies cool completely before serving.
Notes
Ensure butter and water are very cold for a flaky crust.
Do not overmix the dough to avoid toughness.
Chill the dough for at least an hour for easier handling.
Seal the edges firmly with a fork to prevent filling leaks.